Table of Contents
ToggleMobile home roofs take a beating. Flat or low-slope designs that shed water slowly, thinner structural support compared to site-built homes, and decades of thermal expansion mean leaks and soft spots show up faster. The good news? Most mobile home roof repairs are well within reach of a confident DIYer with basic tools and a free Saturday. Whether you’re dealing with a pinhole leak, bubbled coating, or sagging panels, this guide walks through identifying the problem, gathering the right materials, and executing repairs that’ll buy years of dry living, without climbing into a contractor’s schedule or budget.
Key Takeaways
- Mobile home roof repair is manageable for DIYers tackling localized damage like small leaks, peeling coating, and loose fasteners with basic tools and materials costing $50–150 per repair.
- Identify roof problems early by checking for water stains during rain, looking for bubbles in membranes, rust spots on fasteners, and ponding water—soft spots underfoot signal structural damage requiring professional help.
- Surface preparation is critical: thoroughly clean and dry the repair area with a stiff brush and TSP solution before applying patches, as grime blocks adhesion and reduces repair longevity.
- Use roof-type-specific materials—elastomeric coating for metal, EPDM primer and adhesive for rubber, and compatible lap sealant—and seal all patch edges and fasteners with multiple thin topcoats rather than one thick application.
- Call a professional for mobile home roof repair if damage covers more than 20% of the roof, you discover soft decking, roof type is unknown, or you’re uncomfortable with heights.
Understanding Mobile Home Roof Types and Common Problems
Mobile homes typically feature one of three roof systems: metal panels (most common on pre-1980s models), rubber membrane (TPO or EPDM), or built-up roofing with a coating. Metal roofs develop rust pinholes and fastener leaks where screws back out due to temperature cycling. Rubber membranes split at seams and around vents, especially if the adhesive wasn’t applied to clean substrate. Coated roofs, often a silver elastomeric coating over existing material, crack and peel when UV exposure breaks down the polymer.
Common failure points include roof-to-wall junctions, skylight flanges, and vent boots. Mobile home trusses are spaced 16 inches on center with lighter lumber than conventional framing, so water intrusion quickly damages sheathing and insulation. Unlike pitched roofs that drain fast, the shallow slopes (often 1:12 or less) on mobile homes let water pond, accelerating wear. If your home is older than 15 years and you’ve never inspected the roof, assume deferred maintenance is catching up.
Signs Your Mobile Home Roof Needs Repair
Catch problems early. Walk the interior during or just after rain, looking for water stains on ceiling panels, sagging drywall, or musty odors in closets and bathrooms. Stains often appear first at seams where panels meet, or along exterior walls.
On the roof itself, look for:
- Bubbles or blisters in rubber membrane or coating, these trap moisture and expand with heat
- Rust spots or gaps around metal fasteners and ridge caps
- Cracked or missing caulk at vents, skylights, and A/C penetrations
- Ponding water 48 hours after rain, indicates inadequate slope or sagging substrate
- Exposed seams where tape or adhesive has peeled away from rubber or TPO
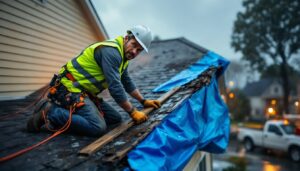
If you see daylight through the roof sheathing from inside the attic space, that’s an immediate repair. Soft spots underfoot while walking the roof signal rotted decking, structural work, not a cosmetic patch.
Essential Tools and Materials for Mobile Home Roof Repair
Gather your kit before climbing up. You don’t want to descend a ladder three times for forgotten supplies.
Tools:
- Utility knife with fresh blades (for cutting membrane and trimming patches)
- Stiff-bristle brush and broom (surface prep is everything)
- Caulk gun
- Putty knife or trowel
- Extension ladder rated for your weight plus materials (Type I or IA)
- Cordless drill with screw bits if re-fastening metal panels
Materials:
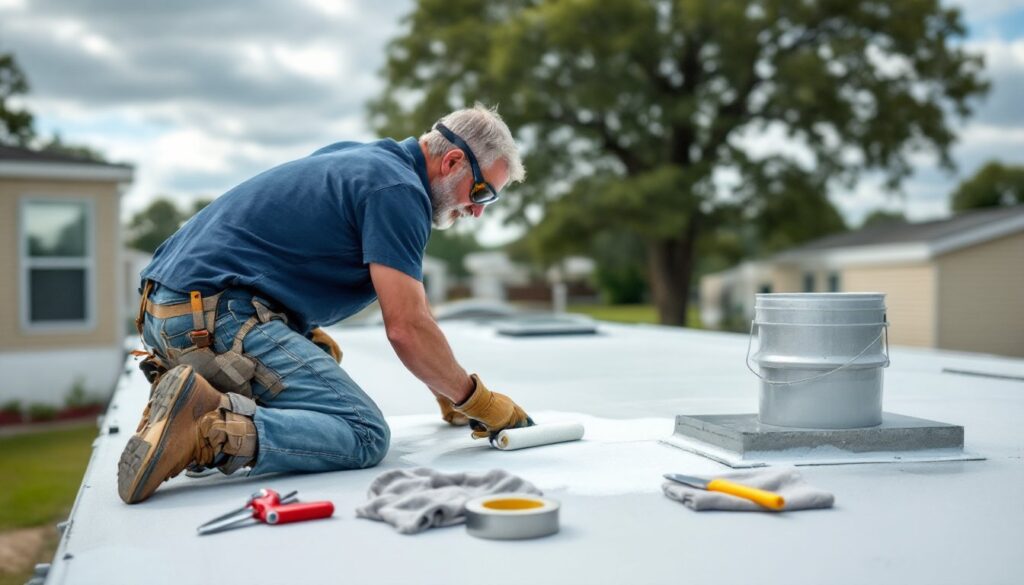
- Roof coating specific to your roof type, elastomeric acrylic for metal, EPDM primer and adhesive for rubber, aluminum fibered coating for built-up roofs (coverage: ~100 sq. ft. per gallon on smooth surfaces)
- Patching membrane or self-adhesive flashing tape (at least 6-inch wide)
- Lap sealant or butyl caulk (not standard silicone, it doesn’t bond well to dirty or flexible surfaces)
- Replacement screws with neoprene washers (if re-securing metal panels)
- Rubbing alcohol or TSP cleaner for degreasing repair areas
- Personal Protective Equipment (PPE): work gloves, safety goggles, knee pads, and non-slip boots. Mobile home roofs are slick when wet, and most coatings irritate skin.
Material choice matters. EPDM rubber patches won’t adhere to TPO without a compatible primer, and generic roof tar cracks in cold weather. When in doubt, many professional contractors can specify the exact product for your roof type if you’re stuck.
Step-by-Step Guide to Repairing Minor Roof Damage
Minor repairs, small leaks, fastener holes, localized cracks, are manageable if the substrate is sound. Structural repairs (rotted decking, truss damage) require tearing out material and possibly a permit. If you’re unsure, poke suspect areas with a screwdriver: if it sinks more than 1/4 inch, you’ve got rot.
Patching Small Leaks and Holes
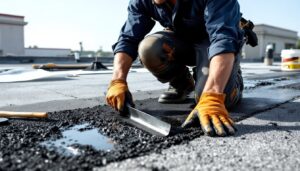
1. Clean the repair area. Sweep away dirt, leaves, and loose coating. Scrub the damaged spot and a 6-inch perimeter around it with a stiff brush and TSP solution or rubbing alcohol. Mobile home roofs accumulate grime that blocks adhesion. Let dry completely, this can take a few hours in humid climates.
2. Cut and apply patch membrane. For rubber roofs, cut a patch of matching EPDM or TPO at least 4 inches wider than the hole on all sides. Apply EPDM primer to both the roof and patch back, wait until tacky (usually 3-5 minutes), then press the patch down firmly, working from center outward to avoid air bubbles. Use a J-roller or rolling pin if you have one.
For metal roofs with pinholes, clean the rust with a wire brush, apply a thin layer of butyl lap sealant, then cover with a patch of self-adhesive aluminum flashing tape. Press hard and seal edges with more sealant.
3. Seal seams and fasteners. Run a continuous bead of lap sealant along all patch edges. For metal panels, check every fastener within 10 feet of the leak, back out any loose screws, apply sealant to the threads and washer, then re-drive snug (don’t overtighten or you’ll dimple the panel). According to guidelines from home service experts, sealing fasteners preemptively during a repair can prevent future leaks.
4. Apply topcoat. Once patches cure (check product instructions, usually 24 hours), brush or roll roof coating over the entire repair and a 12-inch buffer zone. Two thin coats beat one thick coat: allow the first to dry tacky before the second. Coverage is roughly 100 square feet per gallon on smooth surfaces, less on textured or porous materials.
5. Inspect after the next rain. Mark your calendar. Check the interior ceiling and the repair area after a heavy rain to confirm the fix holds.
When to Call a Professional vs. DIY Repairs
DIY makes sense for localized damage: small punctures, peeling coating, a dozen loose fasteners. If you can see the problem from a ladder and fix it in an afternoon, go for it. Most single-section mobile homes can be spot-repaired for $50–150 in materials, depending on the products used.
Call a pro if:
- More than 20% of the roof surface shows damage or the coating is completely failed, a full roof-over or replacement is more cost-effective than endless patches
- You find soft or spongy decking, this means water has rotted the sheathing, and you’ll need to pull panels, replace OSB or plywood, and possibly sister damaged trusses
- The roof system is unknown or a hybrid patchwork from previous repairs, mismatched materials rarely bond well
- You’re uncomfortable with heights or your roof pitch exceeds 4:12, mobile home roofs are low, but a fall is still a fall
- Local code requires a permit for re-roofing, some jurisdictions treat coating application as re-roofing if you exceed a certain thickness or apply over multiple existing layers
Structural work may need engineered drawings and inspection sign-off, especially if you’re in a wind or snow-load zone. For major projects, getting multiple estimates through contractor networks can help you benchmark fair pricing and scope.
Re-roofing a single-wide mobile home typically runs $2,000–4,500 depending on material (TPO, metal, or coating system) and regional labor rates. A double-wide can hit $4,000–8,000. These numbers fluctuate with material costs and local demand, so always get written quotes that itemize labor, materials, and disposal.
Conclusion
Mobile home roofs aren’t exotic, they just fail faster if ignored. Most leaks start small and respond well to targeted patching, fresh sealant, and a quality topcoat. Invest a weekend in preventive sealing around vents and fasteners every few years, and you’ll dodge the expensive emergency calls. Know your limits, respect the structure, and don’t hesitate to bring in a licensed roofer when rot or widespread damage appears. A dry ceiling is worth the effort.