Table of Contents
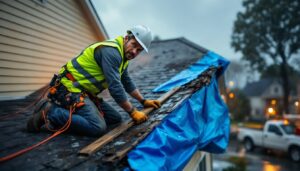
ToggleA ceiling stain doesn’t always mean disaster, but it does mean the clock is ticking. Water entering a home through a compromised roof can damage insulation, framing, drywall, and electrical systems, turning a simple shingle patch into a structural nightmare. The good news? Many roof leaks stem from localized failures that homeowners can repair themselves with basic tools and a ladder. This guide walks through identifying leak sources, executing common repairs like shingle replacement and flashing fixes, and recognizing when professional help is the smarter call.
Key Takeaways
- Leaking roof repair requires identifying the entry point by inspecting your attic for wet streaks and tracing them back to the exterior, since ceiling stains rarely sit directly below the actual breach.
- Common roof leak sources include damaged shingles, failed flashing around chimneys and vents, clogged roof valleys, and ice dams—each requiring different repair approaches.
- DIY shingle replacement and flashing sealing are manageable for homeowners with basic tools, but timing matters: work on mild days (50–70°F) and never attempt repairs during wet or icy conditions.
- Replace cracked vent pipe boots entirely rather than relying on caulk alone; rubber boots degrade within 10–15 years and can be swapped in under 20 minutes for $10–$30.
- Call a professional roofer if the roof pitch exceeds 6:12, structural damage is visible, multiple leaks exist, flashing involves masonry work, or local codes require permits to avoid safety risks and voided insurance claims.
How to Identify the Source of Your Roof Leak
Finding the entry point of a leaky roof repair starts inside the attic, not on the roof itself. Water travels along rafters, underlayment, and sheathing before dripping into living spaces, so ceiling stains rarely sit directly below the breach.
Begin in the attic during or immediately after rain. Use a flashlight to trace wet streaks upward along framing members. Look for dark stains, mold growth, or daylight filtering through gaps. Mark the spot with chalk, then measure its distance from a fixed reference like a chimney or vent pipe. Transfer that measurement to the exterior roof to pinpoint the problem area.
Common leak culprits include:
- Damaged or missing shingles: Wind, hail, or UV degradation can lift, crack, or displace asphalt shingles.
- Failed flashing: Metal or rubber flashing around chimneys, skylights, and vent pipes deteriorates faster than shingles.
- Clogged valleys: Debris accumulation in roof valleys (where two planes meet) traps water and accelerates rot.
- Ice dams (cold climates): Poor attic ventilation allows snow melt to refreeze at eaves, forcing water under shingles.
If there’s no obvious damage from the attic, inspect the exterior on a dry day. Cracked sealant around vents, curled shingle edges, and lifted flashing tabs are dead giveaways. Never attempt roof inspections during wet or icy conditions, falls from heights are the leading cause of DIY roofing injuries. Use a stable extension ladder with standoff stabilizers, and maintain three points of contact at all times.
Essential Tools and Materials for Roof Leak Repair
Most leaky roof repair jobs require a modest toolkit and materials available at any home center. Assemble everything before climbing, multiple trips up a ladder waste time and test patience.
Tools:
- Pry bar or shingle ripper for lifting nails without tearing surrounding shingles
- Hammer or pneumatic roofing nailer (hand-nailing works fine for small patches)
- Utility knife with hook blades for trimming shingles and cutting underlayment
- Caulk gun for applying roof sealant and flashing adhesive
- Tape measure and chalk line for layout and alignment
- Flat trowel or putty knife for spreading roofing cement
Materials:
- Replacement shingles: Match the profile, color, and thickness of existing shingles. Architectural (dimensional) shingles differ from standard three-tab: using the wrong type creates a visible patch.
- Roofing nails: Use 1¼-inch galvanized roofing nails for standard shingles: 1½-inch for thick architectural styles. Stainless steel resists corrosion better than galvanized in coastal or high-humidity climates.
- Asphalt roofing cement: A thick, tar-based adhesive for sealing flashing and securing lifted shingles.
- Flashing (step, valley, or pipe boot): Pre-formed aluminum or copper flashing for chimney and vent repairs. Replace cracked rubber pipe boots entirely, sealant won’t hold.
- Underlayment (tar paper or synthetic): #15 felt or synthetic underlayment for patching large areas of damaged decking.
Safety Gear (non-negotiable):
- Work gloves with grip palms to handle rough shingles and metal flashing
- Safety glasses to protect against flying debris when prying nails
- Slip-resistant boots with ankle support
- Fall protection harness for steep-pitch roofs (4:12 slope or greater)
Skip the trip to the hardware store mid-project by staging tools in a 5-gallon bucket with a tool belt. Clip it to your ladder or hoist it up with a rope.
Step-by-Step DIY Roof Leak Repair Methods
Fixing Shingle Damage and Missing Tiles
Asphalt shingle replacement is the most common how to repair a leaking roof task. Whether a shingle is cracked, curled, or completely absent, the process follows the same sequence.
Step 1: Lift the overlapping shingles. Gently slide a flat pry bar under the shingle course above the damaged piece. Asphalt shingles soften in warm weather, work on a mild day (50–70°F) to avoid cracking brittle material.
Step 2: Remove nails. Each shingle is secured with four to six nails, plus additional nails from the course above. Pry them out carefully, starting with the top row. If a nail head breaks off, drive the shank flush with a nail set to prevent tearing the new shingle.
Step 3: Slide out the damaged shingle. Once nails are removed, pull the old piece straight out. If it resists, check for hidden nails or adhesive strips bonding it to the layer below.
Step 4: Install the replacement. Slide the new shingle into position, aligning its bottom edge with the adjacent pieces. Nail it in place with four roofing nails, positioning them just below the adhesive strip (typically 5½ to 6 inches from the bottom edge). Drive nails flush, overdriving tears the shingle: underdriving creates snag points.
Step 5: Seal the upper course. Lift the overlapping shingles and apply a quarter-sized dab of roofing cement under each tab. Press down firmly. The sun’s heat will activate the adhesive strips over the next few days.
For tile or slate roofs, replacement requires specialized tools and fasteners. Cracked tiles often indicate underlying felt or batten failure, which demands professional assessment. Attempting DIY tile repair without experience risks catastrophic leaks and further damage.
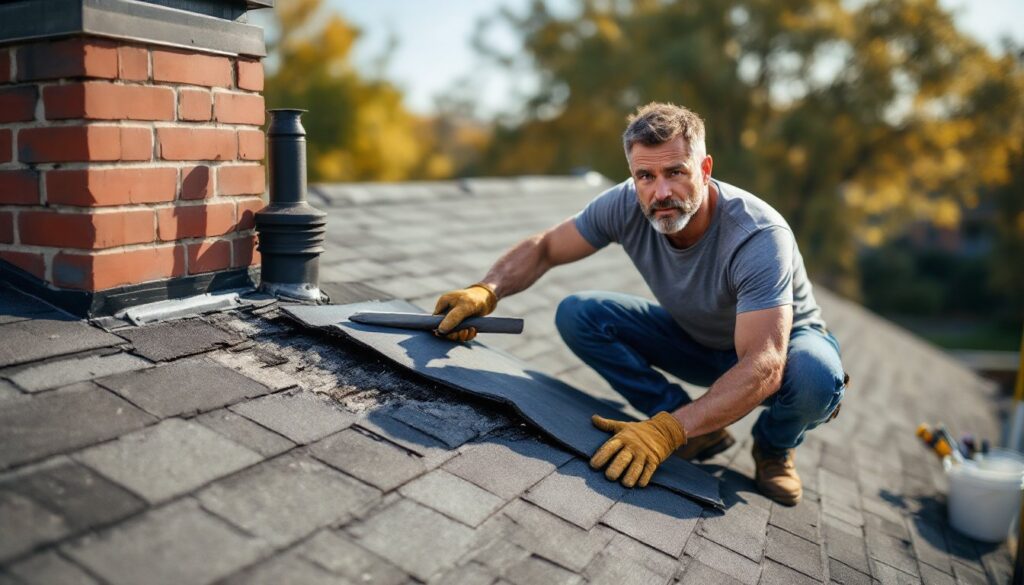
Sealing Flashing and Vent Pipe Leaks
Flashing failures account for roughly 90% of chimney and skylight leaks. Metal flashing expands and contracts with temperature swings, breaking sealant bonds and creating gaps.
For chimney flashing:
- Inspect the step flashing (L-shaped pieces woven into shingle courses) and counter-flashing (embedded in chimney mortar). Look for rust, gaps, or lifted edges.
- Re-seal minor gaps with polyurethane or silicone roof sealant, not latex caulk, which degrades under UV exposure. Apply a continuous bead along the seam where flashing meets brick or shingles.
- Replace corroded flashing entirely if metal shows holes or extensive rust. Remove the shingle courses around the chimney, install new step flashing, and re-shingle. This job often exceeds DIY scope: the average cost to replace chimney flashing ranges from $300 to $900, according to professional roof repair estimates.
For vent pipe boots:
- Check the rubber collar around the pipe. UV degradation causes cracking within 10–15 years.
- Pry up the surrounding shingles and remove nails securing the old boot flange.
- Slide a new pipe boot over the vent pipe. Position the flange under the upper shingles and over the lower course.
- Nail the flange with roofing nails, then seal the nail heads and flange perimeter with roofing cement.
Never rely on caulk alone to fix a cracked pipe boot, the repair will fail within months. Replacement boots cost $10 to $30 and take 20 minutes to install.
When to Call a Professional Roofer
Some leak scenarios demand licensed contractors, not YouTube tutorials. Attempting repairs beyond skill level risks injury, code violations, and voided homeowners insurance claims.
Call a pro if:
- The roof pitch exceeds 6:12. Steep slopes require fall protection systems and specialized staging. OSHA standards mandate guardrails or personal fall arrest equipment for residential roofing work.
- Structural damage is present. Sagging rafters, rotted sheathing, or widespread water stains indicate compromise beyond surface repairs. A structural engineer may need to assess load-bearing capacity before reroofing.
- Multiple leak sources exist. A roof nearing end-of-life (15–20 years for asphalt shingles) often springs leaks in clusters. Patching individual spots becomes a game of whack-a-mole: full replacement is more cost-effective.
- Flashing involves masonry work. Cutting reglets (slots in brick or stone) and installing counter-flashing requires masonry tools and skills most DIYers lack.
- Local codes require permits. Many jurisdictions mandate permits for roof repairs exceeding 100 square feet or involving structural decking. Unpermitted work complicates future home sales and insurance claims.
- The leak is near electrical penetrations. Weatherhead (service entrance) flashing failures pose electrocution risk. Call an electrician and roofer to coordinate repairs.
Professional roofers carry liability insurance and workers’ compensation, critical protections if someone falls or damages property. For guidance on hiring qualified contractors, platforms like Angi provide verified reviews and project cost benchmarks. Similarly, Family Handyman offers tutorials that help homeowners understand repair complexity before deciding whether to DIY or hire out.
Don’t gamble with safety to save a few hundred dollars. A fall from a two-story roof can cause permanent disability or death, stakes that far outweigh the cost of professional help.
Conclusion
Most residential roof leaks stem from fixable issues, a handful of missing shingles, a cracked pipe boot, or deteriorated flashing. Homeowners equipped with basic tools and a methodical approach can handle these repairs and prevent escalating water damage. But knowing limits matters just as much as knowing techniques. When confronting steep pitches, widespread rot, or structural concerns, professional intervention isn’t just smart, it’s essential.