Table of Contents
ToggleMetal roofing lasts 40-70 years with proper maintenance, but even the toughest panels develop problems. A small leak near a seam can spread to the decking. Loose screws work themselves out during wind events. Corrosion creeps in where coatings fail. The good news? Most metal roof issues are straightforward repairs that homeowners can tackle with basic tools and a ladder rated for the job. This guide walks through the most common metal roofing problems, covering tin roof repair, sheet metal roof repair, and metal building roof repair, and shows how to fix them before minor damage turns into a costly replacement.
Key Takeaways
- Metal roof repair for common issues like leaks, loose fasteners, and surface rust can be handled by confident DIYers with basic tools and proper safety precautions.
- Address metal roofing problems immediately when water stains or loose fasteners appear, as delaying repairs allows moisture damage that can turn a $50 fix into costly structural work.
- Metal roof repair requires specialty materials including stainless steel fasteners with neoprene washers, butyl or urethane sealant (not silicone), and matching patching material for lasting results.
- DIY projects should be limited to small seam reseals, replacing missing screws, patching minor punctures, and treating surface rust, while steep pitches, widespread leaks, and structural damage require professional contractors.
- Metal roofs can last 40-70 years with proper maintenance, making early intervention on small issues a cost-effective strategy compared to premature replacement.
Common Metal Roof Problems and When to Repair
Metal roofs fail at predictable points. Identifying the issue early determines whether it’s a weekend fix or a call to a pro.
Leaks at seams and fasteners are the most frequent problem. Standing-seam panels expand and contract with temperature swings, and over time, sealant degrades or fasteners loosen. Water enters through screw holes or where panels overlap.
Missing or backing-out screws happen when rubber washers compress or when installers overtightened fasteners during installation. Wind lifts panels slightly, and the problem compounds.
Rust and corrosion appear on older galvanized steel or anywhere the coating is scratched. Coastal environments and areas with acid rain accelerate oxidation. Surface rust is repairable: structural rust often requires panel replacement.
Dents and punctures from hail, falling branches, or foot traffic during maintenance create weak points. Small dents are cosmetic, but punctures compromise waterproofing.
Flashing failures around chimneys, vents, and roof-to-wall transitions let water behind panels. Flashing relies on sealant and proper overlap: both degrade over time.
Repair immediately if water stains appear on ceilings, if you see daylight through the roof deck from the attic, or if fasteners are visibly loose. Delaying repairs allows moisture into sheathing and framing, turning a $50 fix into structural work.
Essential Tools and Materials for Metal Roof Repair
Most metal roof repairs require tools already in a DIYer’s arsenal, plus a few specialty items.
Tools:
- Cordless drill/driver with hex-head bit for metal roofing screws
- Caulking gun for butyl or polyurethane sealant
- Wire brush or angle grinder with wire wheel for rust removal
- Tin snips (straight-cut and offset) for trimming patches
- Rivet gun (if working with riveted seams)
- Ladder rated for your weight plus materials (Type I or IA)
- Safety harness and anchor point for pitches over 6:12
Materials:
- Metal roofing screws with neoprene or EPDM washers (stainless steel for coastal areas: #12 × 1″ or 1-1/4″ common)
- Butyl or urethane sealant (not silicone, it doesn’t adhere well to metal or paint)
- Metal patching material matching roof gauge and finish (28-gauge or 29-gauge steel or aluminum)
- Rust converter or primer (oil-based or DTM, direct-to-metal)
- Touch-up paint in roof color (check manufacturer for exact match)
- Replacement fastener caps if originals are damaged
PPE:
- Gloves (leather for handling sharp edges)
- Safety glasses
- Non-slip boots (metal roofs are slick, especially when wet)
- Knee pads for extended work
Metal roofing supply yards carry most materials. Bring a sample of your panel profile and a photo of the roof color for matching.
How to Repair Leaks in Metal Roofing
Leaks typically occur at seams, fasteners, or flashing. Isolate the source before starting repairs, water travels along panels and framing before dripping, so the stain inside rarely sits directly below the entry point.
Step 1: Locate the leak. From the attic, mark the wet spot on the underside of the decking with chalk. Measure from a reference point (chimney, vent pipe) to find the spot on the roof surface. Leaks near seams or fasteners are the usual suspects.
Step 2: Clean the area. Use a wire brush or rag with mineral spirits to remove dirt, old sealant, and oxidation. The repair won’t bond to contaminated metal. Let the area dry completely.
Step 3: Reseal seams. Apply a bead of butyl or urethane sealant along the seam, forcing it into gaps with a putty knife. Overlap the seam by 1/2″ on each side. Smooth the bead to prevent water pooling.
Step 4: Patch punctures or holes. Cut a patch from matching metal, 2″ larger than the hole in all directions. Round the corners to prevent snagging. Apply sealant to the back of the patch and press it over the hole. Secure with metal roofing screws at 2″ intervals around the perimeter. Add a thin bead of sealant over the patch edges.
Step 5: Seal fasteners. If the leak is at a screw, remove it, inspect the washer (replace if cracked or compressed), and reinstall. Don’t overtighten, stop when the washer just compresses. Dab sealant on the washer if it’s in a known trouble spot.
For standing-seam roofs, avoid breaking the seam unless absolutely necessary. Work sealant into the seam from the end using a narrow applicator tip. Structural leaks or widespread seam failure often require a professional with seaming tools.
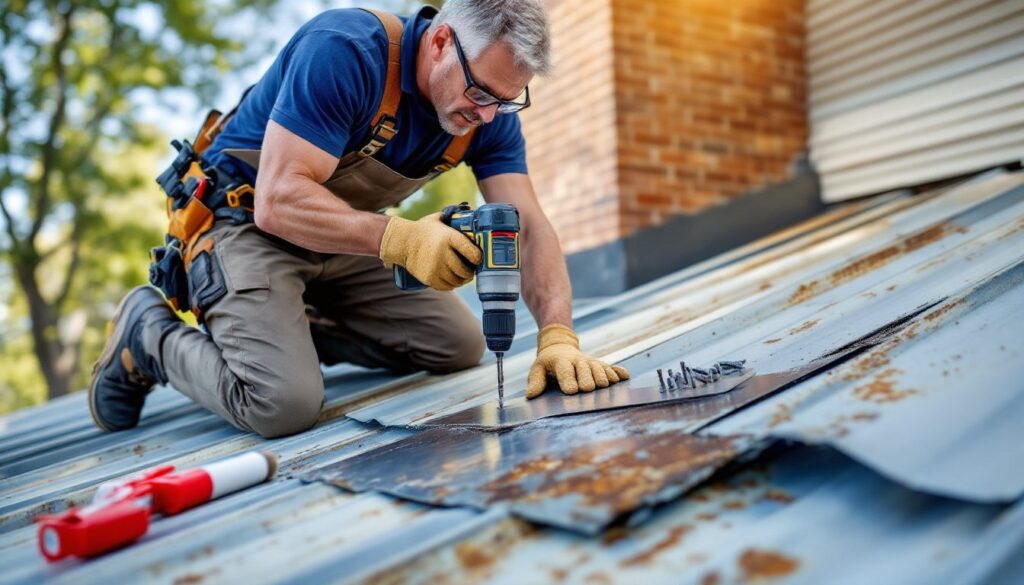
Fixing Loose or Missing Fasteners and Screws
Loose screws compromise the roof’s wind resistance and create entry points for water. Walk the roof (carefully) and mark any screws that spin freely or are missing.
Step 1: Remove the loose screw. If the screw spins without tightening, it’s stripped the wood decking or pulled through the washer. Back it out completely.
Step 2: Evaluate the hole. If the decking is sound, move the fastener 1″ to the side and drive a new screw into fresh wood. If the decking is soft or rotten, that’s a bigger issue, consult a roofer or carpenter to assess sheathing damage.
Step 3: Install a new fastener. Use a metal roofing screw with a fresh neoprene washer. Drive it perpendicular to the roof surface, snug but not crushed. The washer should compress slightly, overtightening cracks it and creates a future leak. Many pros use a drill with an adjustable clutch set to stop at the correct torque.
Step 4: Seal the old hole. Dab butyl sealant into the abandoned screw hole to prevent water infiltration.
Fastener spacing matters. Screws should be installed on the flat of the panel (not in the raised ribs) and spaced per manufacturer spec, typically 12″ to 24″ on-center along purlins for corrugated panels. For sheet metal roof repair on commercial or agricultural buildings, fastener patterns may differ. Check the original installation or local contractor recommendations if uncertain.
Missing screws along the roof edge or ridge are priorities, they’re most vulnerable to wind uplift.
Repairing Rust Spots and Corrosion Damage
Surface rust on galvanized or painted steel is fixable. Rust that’s eaten through the metal requires a patch or panel replacement.
Step 1: Remove loose rust. Use a wire brush, wire wheel on an angle grinder, or 80-grit sandpaper to remove flaking rust and paint. Work until you reach clean metal or a stable rust layer. Wear a dust mask, metal dust and old paint may contain lead or zinc.
Step 2: Apply rust converter (optional but recommended). Products containing tannic acid or phosphoric acid chemically convert rust to a stable compound. Follow label directions for dry time, usually 24-48 hours.
Step 3: Prime bare metal. Use an oil-based metal primer or a DTM (direct-to-metal) primer. These bond to metal and provide corrosion resistance. Apply a thin, even coat and let it cure per the label.
Step 4: Paint. Use paint that matches the roof’s finish and is rated for metal roofing (acrylic or urethane-based). Apply two thin coats rather than one heavy coat to avoid runs. Feather the edges into the surrounding painted surface.
Step 5: Seal edges. If the repair is near a seam or fastener, run a bead of sealant along the perimeter to lock out moisture.
For extensive rust or pitting deeper than 1/16″, consider patching with new metal as described in the leak repair section. Rust that’s spread across multiple panels or structural members is often a sign the roof is nearing end-of-life. In those cases, seasonal maintenance guides can help homeowners plan for replacement timing.
Tin roof repair frequently involves rust removal, older tin (actually terne-coated steel) is prone to oxidation once the coating fails. Keep up with repainting every 3-5 years to extend the roof’s service life.
When to DIY vs. When to Call a Professional
Not all metal roof repairs are DIY-friendly. Some jobs require specialized tools, safety equipment, or expertise, and mistakes can void warranties or create liability.
DIY-appropriate repairs:
- Resealing small seams or isolated fastener leaks
- Replacing a few missing screws
- Patching minor punctures or dents (under 6″ diameter)
- Treating surface rust on accessible areas
- Touching up paint on limited spots
Call a professional for:
- Steep pitches (over 6:12), fall risk is significant, and pros have the rigging
- Widespread leaks or seam failures across multiple panels (indicates systemic issues)
- Standing-seam repairs that require re-seaming tools or panel removal
- Structural damage to decking, trusses, or purlins
- Flashing replacement around complex penetrations (chimneys, skylights)
- Rust-through or corrosion affecting more than 20% of the roof surface
- Permit-required work (codes vary: some jurisdictions require permits for roofing work over a certain square footage)
Metal building roof repair, especially on barns, shops, or commercial structures, often involves large panels, high sidewalls, and open spans. If the building has purlin spacing over 24″ or uses structural metal decking, hire a contractor familiar with pre-engineered metal buildings.
Safety is non-negotiable. If the roof is wet, icy, or you’re uncomfortable with heights, don’t attempt the repair. For help finding qualified pros, resources like Angi provide contractor reviews and project cost breakdowns.
Conclusion
Metal roof repairs don’t have to be intimidating. Most leaks, loose fasteners, and rust spots are within reach of a confident DIYer armed with the right materials and a respect for safety. Tackle small problems early, before they become big ones, and a well-maintained metal roof will outlast nearly every other roofing material on the market. For anything that feels beyond your skill level or safety comfort zone, bringing in a pro is money well spent.