Table of Contents
ToggleThat brown streak on your favorite ceramic mug isn’t coffee staining, it’s rust from a worn-out dishwasher rack coating. Once the vinyl or nylon coating chips away, exposed metal corrodes fast, leaving rust marks on dishes and threatening the rack’s structural integrity. Replacing an entire dishwasher rack runs $80–$150 depending on the model, but a repair kit costs $10–$25 and takes less than an hour to apply. Whether you’re dealing with broken tine tips, rusted wire sections, or cracked rack edges, the right repair approach can add years to your dishwasher’s life without the expense of replacement parts or service calls.
Key Takeaways
- A dishwasher rack repair kit costs $10–$25 and can extend rack life by years, making it a cost-effective alternative to replacing racks that cost $80–$150.
- Vinyl coating kits, tine replacement kits, and combination kits address different damage types—choose based on whether you have isolated chips, broken tines, or widespread coating failure.
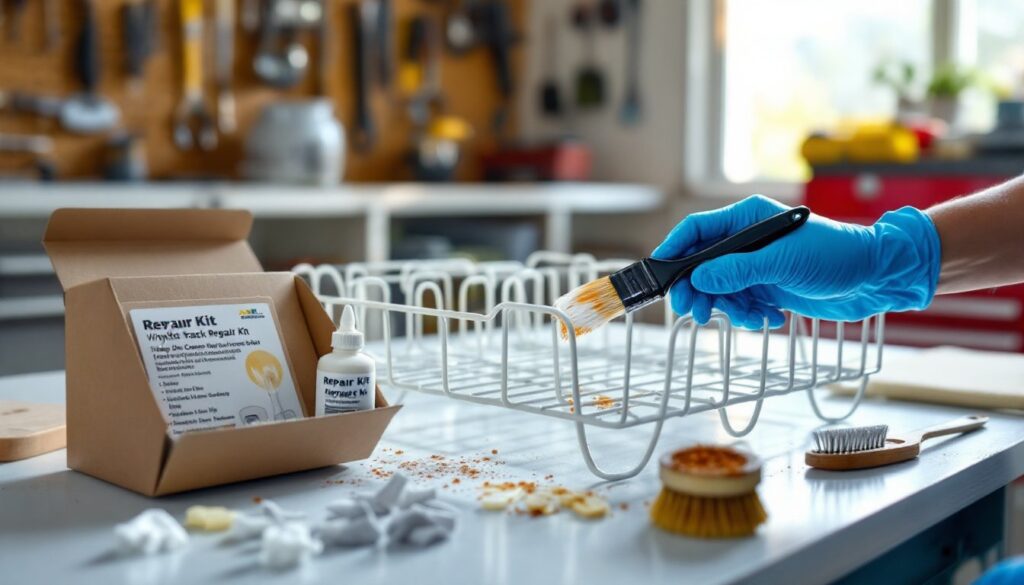
- Proper surface preparation is critical: clean the rack thoroughly, scrape off loose rust, and wipe with isopropyl alcohol before applying coating to ensure durable adhesion.
- Quality vinyl repair kits withstand temperatures up to 200°F and remain pliable through dishwasher temperature swings, unlike epoxy solutions that can crack under thermal cycling.
- Prevent future rack damage by loading dishes carefully, avoiding metal-on-metal contact, using gentler detergents, and inspecting racks every few months for early coating damage.
- Once the protective vinyl coating fails and bare metal is exposed, rust develops quickly—addressing early warning signs like chipped coatings prevents rust stains on dishes and structural deterioration.
What Is a Dishwasher Rack Repair Kit?
A dishwasher rack repair kit is a specialized product designed to restore the protective coating on metal dishwasher racks. Most kits include a liquid vinyl or rubber compound that seals exposed metal, preventing rust and further corrosion.
Typical kits contain a bottle of vinyl sealant (usually 0.5–1 oz), removable tine tips in assorted sizes, and sometimes small wire caps for sealing broken wire ends. The vinyl compound air-dries to form a flexible, waterproof barrier that withstands the heat, moisture, and detergent exposure inside a dishwasher.
These kits work on both upper and lower racks and are compatible with most major dishwasher brands, Whirlpool, GE, Bosch, KitchenAid, and Maytag. The coating bonds directly to bare metal or over small areas of existing vinyl, creating a durable repair that flexes with the rack during normal use.
Unlike epoxy-based solutions that can crack under thermal cycling, vinyl compounds in quality repair kits remain pliable through temperature swings from cold rinses to high-heat drying cycles. This elasticity is critical for long-term durability in a dishwasher environment.
Signs Your Dishwasher Rack Needs Repair
Rust stains on dishes are the most obvious indicator, brown or orange residue transferred from the rack during wash cycles means the protective coating has failed. But other warning signs appear before rust becomes a problem.
Common damage patterns include:
- Chipped or peeling vinyl coating at contact points where dishes lean against wires
- Exposed silver or gray metal at tine tips, corners, or high-wear areas
- Broken or bent tines that no longer hold dishes securely
- Cracked plastic end caps on rack edges or wheel assemblies
- White or gray corrosion buildup on bare metal sections
The coating typically fails first at stress points, where the rack bends during loading, where dishes rest most frequently, or at welded joints. Once a small chip exposes bare metal, moisture and detergent quickly accelerate corrosion.
Ignoring early damage leads to bigger problems. Rust flakes contaminate dishes, stain dishwasher interiors, and eventually weaken rack structure. Addressing minor coating damage early prevents rust from spreading and extends rack life by several years.
Types of Dishwasher Rack Repair Kits
Repair kits fall into three main categories, each suited to different damage scenarios.
Vinyl coating kits are the most common and versatile option. They include a brush-on liquid vinyl compound in colors like white, gray, or black to match existing rack coatings. These work best for sealing chipped areas, covering rust spots, and recoating worn wire sections. Application is straightforward, clean the area, brush on the coating, and let it cure for 24 hours before running the dishwasher.
Tine repair kits focus on replacing broken or missing tine tips, the plastic nubs that hold dishes in place. Kits typically include 10–20 replacement tips in various diameters (⅛” to ¼”) that slide over wire ends and secure with the included vinyl coating. Some premium kits include silicone caps that offer better grip and flexibility than standard vinyl tips.
Combination kits bundle vinyl coating, tine tips, and sometimes additional components like wire caps or small metal clips for reattaching separated rack sections. These provide the most comprehensive repair capability and are worth the slight cost premium ($20–$25 vs. $10–$15 for single-purpose kits).
Some manufacturers sell color-matched kits specific to their dishwasher models. While universal kits work fine for most repairs, OEM-matched products ensure an exact color blend if appearance matters in your application.
How to Choose the Right Repair Kit for Your Dishwasher
Start by assessing the extent and location of damage. Small chips and isolated rust spots need only a basic vinyl coating kit. Widespread coating failure or multiple broken tines warrant a combination kit.
Color matching matters less than you’d think, most racks are white, gray, or black, and slight shade variations aren’t noticeable once the rack is loaded. Universal kits in neutral colors work for nearly all applications. Focus instead on coating quality and coverage area.
Check the kit’s stated coverage, most 0.5 oz bottles cover 12–18 linear feet of wire, enough for several repair spots or one heavily damaged rack. If you’re recoating large sections or both upper and lower racks, buy two kits or a larger bottle.
Temperature rating is critical. Quality vinyl coatings withstand temperatures up to 200°F, which covers normal dishwasher drying cycles. Avoid kits without clear temperature specifications, they may soften or peel during heated dry cycles.
For tine replacement, measure the wire diameter on your rack before buying. Most dishwasher wires are 3/32″ to ⅛” diameter, but some European models use slightly thinner wire. Kits with assorted tip sizes eliminate guesswork.
Consider drying time if you need the dishwasher back in service quickly. Standard vinyl coatings require 24 hours to fully cure, but some fast-cure formulations are ready in 8–12 hours. Read the label if timing matters.
Step-by-Step Guide to Repairing Your Dishwasher Rack
Proper surface prep makes the difference between a repair that lasts years and one that fails in weeks. Don’t rush this part.
Materials and Tools Needed
- Dishwasher rack repair kit (vinyl coating and/or tine tips)
- Wire brush or coarse sandpaper (80–120 grit)
- Isopropyl alcohol (70% or higher) or acetone
- Clean rags or paper towels
- Latex or nitrile gloves (vinyl coating stains hands)
- Small paintbrush or foam applicator (if not included in kit)
- Well-ventilated workspace (garage or outdoor area)
Repair Process
-
Remove the rack from the dishwasher. Pull the lower rack straight out: the upper rack may require releasing side clips or lifting off the track guides.
-
Clean the entire rack with hot, soapy water to remove grease, detergent residue, and food particles. Rinse thoroughly and let dry completely.
-
Prep damaged areas by scraping off loose rust and coating with a wire brush. For stubborn rust, use 80-grit sandpaper to expose clean metal. The goal is a smooth, clean surface, any remaining rust or loose material will compromise adhesion.
-
Wipe down prepped areas with isopropyl alcohol or acetone. This removes oils and ensures proper bonding. Let the cleaner evaporate completely (2–3 minutes).
-
Apply vinyl coating with the included brush or a small paintbrush. Use thin, even coats rather than one thick application, multiple thin layers cure better and resist cracking. Cover all exposed metal and extend the coating slightly beyond damaged areas onto intact vinyl.
-
Replace broken tines by sliding new tips over wire ends. If the wire end is sharp or damaged, use wire cutters to trim it flush, then file smooth before adding the tip. Secure tine tips with a small dab of vinyl coating around the base.
-
Let the coating cure in a well-ventilated area for the time specified on the kit label, typically 24 hours. Some manufacturers recommend applying a second coat after the first dries to the touch (4–6 hours).
-
Reinstall the rack after the full cure time. Run an empty cycle to ensure the coating withstands operating conditions before loading dishes.
Safety Notes
Work in a well-ventilated space, vinyl coatings release VOCs during application and curing. Wear nitrile gloves to avoid skin contact: the coating is difficult to remove once dried. If working with a wire brush, wear safety glasses to protect eyes from rust particles and metal debris.
Tips for Preventing Future Dishwasher Rack Damage
Most rack damage comes from avoidable loading habits and environmental factors.
Load dishes carefully, jamming pots and pans into the rack bends wires and stresses coating at contact points. Space items so they don’t press hard against tines or rack edges. Heavy cast iron and stoneware exert the most pressure: load these in the lower rack where wire gauge is thicker.
Avoid metal-on-metal contact. Stainless steel utensils, aluminum pans, and metal mixing bowls scratch rack coating when they shift during wash cycles. Use the silverware basket for utensils rather than laying them flat on racks.
Skip harsh detergents with high alkalinity, they accelerate vinyl breakdown. Powdered detergents are more abrasive than liquid or pod formulations. If you notice coating wearing faster than expected, switching to a gentler detergent can slow deterioration.
Mind the heat. Extended high-heat drying cycles stress rack coatings over time. If your dishwasher has an air-dry or energy-saver option, use it to reduce thermal cycling. The coating will last longer at 140°F than at 180°F.
Inspect racks every few months and touch up small chips before they become rust spots. Keeping a repair kit on hand lets you address damage immediately rather than waiting until rust spreads. Professional kitchen maintenance practices emphasize early intervention for extending appliance life.
Handle racks gently when pulling them out, jerking or dropping racks onto the floor cracks coating at stress points. Support the rack from underneath when fully extended rather than pulling on the front edge.
Conclusion
Dishwasher rack repair offers a practical, low-cost alternative to expensive replacement parts. With proper surface prep and quality materials, a $15 repair kit extends rack life by years, preventing rust damage and keeping dishes clean. The work takes less than an hour of active time, and the skills transfer to other appliance maintenance tasks around the house. Catching coating damage early and applying repairs correctly means your dishwasher racks will outlast many of the appliance’s other components.