Table of Contents
ToggleA KitchenAid stand mixer is built to last decades, but even the toughest machines need fresh parts eventually. Gears wear down, attachments crack, and seals start leaking, it’s normal. The good news? Most KitchenAid mixer parts are replaceable with basic tools and a little patience. You don’t need a service center for every rattle or wobble. Understanding which components fail first, how to identify the exact part you need, and where to source genuine replacements will save time, money, and keep that mixer running like new. This guide walks through the essential parts every owner should recognize, common failure points, and practical steps to diagnose and fix issues without calling in a pro.
Key Takeaways
- Most KitchenAid mixer parts like worm gears, grease, and motor brushes are replaceable with basic hand tools and cost under $50, making DIY repairs practical for home bakers.
- The worm gear is the most common failure point and acts as a sacrificial part designed to fail before the motor burns out, typically needing replacement every 5-10 years with heavy use.
- Accurate diagnosis using the mixer’s model number and exploded diagrams prevents ordering incompatible parts and ensures you get genuine KitchenAid mixer replacement parts from reliable retailers.
- Preventive maintenance such as re-greasing every 5-7 years, hand-washing attachments, and respecting the bowl’s capacity rating can dramatically extend part life and prevent costly repairs.
- Common symptoms like grinding noise indicate worn gears, burning smells point to motor brushes, and wobbling attachments suggest a loose hub, helping you identify exactly which parts need replacement.
Essential KitchenAid Mixer Parts Every Owner Should Know
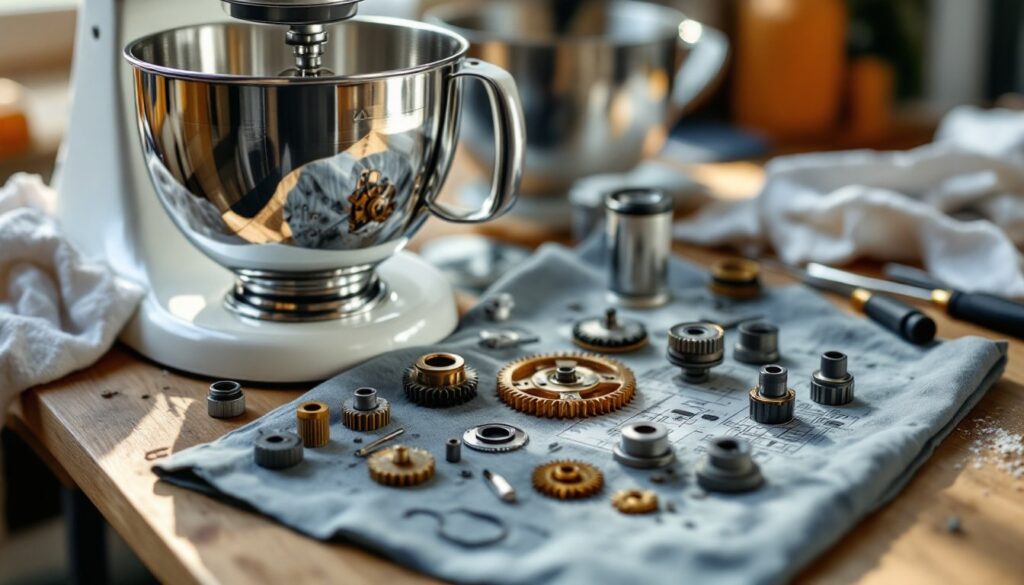
Understanding your mixer’s anatomy helps you troubleshoot faster and order the right replacement when something breaks. Here are the core components:
Planetary gear assembly: The heart of your mixer’s motion. This system rotates the beater in one direction while moving it around the bowl in the opposite direction, ensuring even mixing. When it fails, you’ll hear grinding or experience inconsistent beater movement.
Worm gear: A sacrificial part designed to fail before the motor burns out. Made from softer metal, it strips under excessive load (like thick bread dough in an undersized model). If your mixer runs but the beater doesn’t turn, this is usually the culprit.
Beater shaft and hub: Connects attachments to the motor. The hub can crack from repeated stress, especially if attachments aren’t locked properly. Check for wobble or play in the attachment connection.
Motor brushes: Carbon blocks that conduct electricity to the motor’s commutator. As they wear down (usually after 5-10 years of heavy use), you’ll notice reduced power, sparking, or a burning smell.
Speed control plate: Regulates motor speed. Failure symptoms include stuck speeds, erratic jumping between settings, or complete loss of control.
Grease (food-grade): Lubricates the gear system. Old grease turns dark and thick, causing excessive heat and noise. KitchenAid specifies a particular food-safe lubricant for these machines.
Beater attachments: The flat beater, wire whip, and dough hook. Nonstick coating can wear off, and metal can bend or crack over time, especially on older models.
Common Parts That Need Replacement Over Time
Not all parts wear at the same rate. Here’s what typically fails first and why:
Worm gear (every 5-10 years with heavy use): This is the most common repair. If you regularly knead dense dough or overload the bowl, expect to replace this sooner. It’s a $15-25 part that prevents a $200 motor replacement.
Grease (every 5-7 years): Even if nothing breaks, old grease hardens and loses effectiveness. Re-greasing prevents gear damage and reduces operating noise. You’ll need about 4 ounces of KitchenAid-approved food-grade grease for a complete service.
Motor brushes (every 10-15 years): Heavy bakers may need these sooner. Signs include intermittent power loss or visible sparking through the motor vents. Brushes come in pairs and cost $10-20.
Beater attachments (variable): The flat beater sees the most abuse. The nonstick coating chips off, and the metal can warp if left in the dishwasher repeatedly (hand-wash only). Replacement beaters run $15-40 depending on the model.
Speed control plate (10-20 years): Less common but frustrating when it fails. The plate uses resistance coils to adjust speed: over time, connections corrode or burn out. Replacement costs $20-35.
Planetary assembly (rare, but expensive): Usually only fails if the mixer ran without grease for extended periods. This is a $60-90 part requiring significant disassembly.
Many home bakers can tackle a kitchenaid mixer repair kit that includes the worm gear, grease, and basic gaskets, essentially a full tune-up in one package for about $30-50.
How to Identify Which Part You Need
Accurate diagnosis saves return shipping fees and wasted time. Follow this process:
Start with the model number: Look on the bottom of the mixer or inside the hinge. KitchenAid uses model-specific parts, especially for attachments and housing components. The model number usually starts with “K” or “KSM” followed by numbers.
Listen and observe: Different failures produce distinct symptoms. Grinding noise during operation points to worn gears or lack of grease. A burning smell suggests motor brushes. Wobbling attachments indicate a loose or cracked hub.
Test systematically:
- Does the motor run? If no, check the speed control plate and motor brushes.
- Does the motor run but the beater doesn’t turn? Likely a stripped worm gear.
- Does it run rough or loud? Probably needs fresh grease.
- Does it work inconsistently across speeds? Speed control plate issue.
Consult exploded diagrams: KitchenAid and third-party sites publish detailed breakdowns showing every part and its part number. Match your symptoms to the diagram location.
Use the official part number: Once identified, search by the specific KitchenAid part number (e.g., “W10112253” for a common worm gear) rather than a generic description. This ensures compatibility across the hundreds of mixer variants produced over decades.
If you’re unsure, many specialty kitchen sites offer troubleshooting guides with photos of common failures to compare against your mixer’s behavior.
Where to Buy Genuine KitchenAid Mixer Parts
Sourcing the right parts for kitchenaid mixer repair matters, counterfeit or wrong-spec components can damage your machine further.
KitchenAid directly: Their online parts store guarantees authenticity but often charges a premium. Ships from authorized warehouses. Use this option for critical components like the motor or planetary assembly.
Appliance parts retailers: Sites like PartSelect, RepairClinic, and AppliancePartsPros stock OEM (Original Equipment Manufacturer) parts at competitive prices. They cross-reference model numbers and show exploded diagrams. Shipping is usually fast (2-5 days).
Amazon and eBay: Viable for common items like beaters, bowls, and basic kitchenaid stand mixer replacement parts. Read reviews carefully, some sellers list “compatible” parts that don’t quite fit. Stick to sellers with high ratings and clear return policies.
Local appliance repair shops: Often stock common parts like worm gears and grease. You’ll pay slightly more, but you can verify fit before buying and get advice from techs who’ve seen hundreds of these mixers.
Repair kits: For first-time repairs, a kitchenaid mixer repair kit bundles the worm gear, grease, and sometimes a new washer or seal. These kits (available from most retailers above) cost $30-60 and include everything for a standard tune-up.
Verify the part number: Always double-check compatibility. KitchenAid has manufactured mixers since 1919, and even visually identical models may use different internal parts. Match your model number to the part’s compatibility list before ordering.
Step-by-Step Guide to Replacing the Most Common Parts
Most kitchenaid mixer repair parts replacements require only basic hand tools. Here’s how to tackle the most frequent repairs:
Replacing the Worm Gear and Re-Greasing
Tools needed: Flathead screwdriver, Phillips screwdriver, adjustable wrench, clean rags, food-grade mixer grease.
Safety first: Unplug the mixer. Wipe down the exterior to prevent debris from falling into the gearbox.
- Remove the motor housing: Flip the mixer over. Remove the bottom plate (typically 4-6 screws). Lift off the planetary drip ring if present.
- Extract the planetary assembly: Unscrew the central bolt holding the planetary. Gently pull the assembly straight down. Note the orientation, take a photo if needed.
- Remove old grease: Scrape out all old, discolored grease with a rag. Don’t skip this, mixing old and new grease reduces effectiveness.
- Inspect the worm gear: It’s a small bronze gear on the motor shaft. If teeth are stripped or worn flat, pry it off and press on the new one (no tools needed: it’s a friction fit).
- Apply new grease: Pack about 3-4 ounces of grease into the planetary housing and around visible gears. Don’t overfill, excess grease can leak onto your countertop.
- Reassemble: Reverse the process. Torque the central bolt snugly but don’t overtighten (about 15-20 ft-lbs if you have a torque wrench).
- Test: Plug in, run at low speed for 30 seconds to distribute grease, then test all speeds.
Replacing Motor Brushes
- Access the motor: Remove the bottom plate and planetary as above.
- Locate brush caps: Two circular caps on opposite sides of the motor housing.
- Remove old brushes: Unscrew caps, pull out spring-loaded brushes. Note the orientation, new brushes must seat the same way.
- Install new brushes: Slide in, replace springs and caps. No break-in needed.
Swapping Beater Attachments
No tools required. Twist the attachment counterclockwise and pull down. Align the new attachment’s pin with the slot, push up, twist clockwise until it locks. If attachments are loose or wobbly, the beater shaft hub may need replacement, a more involved repair requiring disassembly of the mixer head.
For more advanced tasks like speed control plate replacement, consider whether the repair cost justifies the effort. That repair requires desoldering wires and careful reassembly. A professional repair runs $80-120: weigh that against the mixer’s age and value. Many enthusiast sites recommend replacing vs. repairing mixers older than 20 years unless they have sentimental value.
Maintenance Tips to Extend the Life of Your Mixer Parts
Preventive care beats emergency repairs. Here’s how to minimize wear:
Don’t overload the bowl: Each mixer model has a rated capacity. The Classic can handle 5 cups of flour: the Pro 600 can manage 14. Exceeding capacity stresses the worm gear and motor.
Use the right speed: Start slow (speed 2) for thick doughs, then increase gradually. Jumping straight to speed 6 with cold ingredients shocks the drivetrain.
Hand-wash attachments: Dishwashers warp aluminum and strip nonstick coatings. Wash beaters in warm soapy water and dry immediately.
Re-grease every 5-7 years: Even if nothing’s broken, old grease hardens and causes premature gear wear. Mark your calendar, this 30-minute job prevents a $100 repair later.
Check attachment fit: Loose attachments wobble and stress the hub. If an attachment feels sloppy, replace the beater shaft or hub before it cracks.
Store properly: Keep the mixer covered in a dry location. Moisture corrodes electrical contacts and rusts springs.
Match attachments to tasks: Don’t use the dough hook for whipping cream or the wire whip for thick cookie dough. Purpose-built attachments reduce strain and improve results.
Listen for changes: New noises, hesitation, or vibration are early warnings. Addressing minor issues before they cascade saves money and downtime.
Conclusion
KitchenAid mixers are repairable machines, not disposable appliances. Most common failures, worm gears, grease, and motor brushes, are well within DIY capability and cost under $50 in parts. Understanding the core components, diagnosing issues methodically, and sourcing genuine parts keeps these workhorses running for generations. Preventive maintenance like re-greasing every few years and respecting load limits dramatically extends part life. When in doubt, an exploded diagram and the model number are your best tools for ordering the exact component you need.