Table of Contents
ToggleModified bitumen roofing is a workhorse in low-slope and flat roof applications, durable, flexible, and designed to handle temperature swings that would crack other materials. But even the best bitumen roof repair isn’t immune to wear. UV exposure, standing water, and thermal cycling eventually cause cracks, blisters, and tears. The good news? Many of these problems are well within the reach of a confident DIYer, especially if caught early. This guide walks through identifying damage, gathering the right materials, and executing repairs that’ll extend your roof’s life without calling in a crew for every small issue.
Key Takeaways
- Modified bitumen roof repair is achievable for DIYers when damage is localized, allowing you to extend your roof’s lifespan by addressing small cracks, blisters, and tears early.
- Cold-applied bitumen mastic and self-adhering patch membranes are the essential materials for simple repairs, requiring no torch or advanced skills if work temperatures stay between 50°F and 85°F.
- Always inspect your modified bitumen roof twice yearly (spring and fall) to catch water stains, blisters, and seam separation before they cause costly interior damage.
- Larger tears, structural damage, or repairs covering more than 10–15% of the roof surface require professional assessment to avoid costly mistakes and ensure long-term durability.
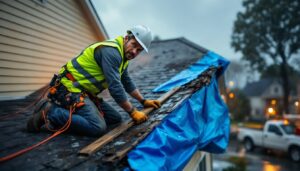
- Proper safety equipment, including fall-arrest harnesses and non-slip footwear, is non-negotiable for roof work due to slippery conditions on low-slope surfaces.
What Is Modified Bitumen Roofing and Why Does It Need Repair?
Modified bitumen is an asphalt-based roofing membrane reinforced with polyester or fiberglass and modified with polymers (typically SBS rubber or APP plastic) to improve flexibility and durability. It’s installed in rolled sheets, either torch-applied, cold-adhered, or self-adhering, and often finished with a granulated mineral cap sheet for UV protection.
Roofs need repair for a few predictable reasons. Thermal cycling, the daily expansion and contraction from temperature swings, stresses seams and can cause surface cracks. Ponding water (water that sits for more than 48 hours) accelerates membrane breakdown, especially if drainage is poor. UV degradation slowly hardens the bitumen, making it brittle. Physical damage from foot traffic, hail, or falling branches creates punctures and tears. And improper installation, inadequate overlap, poor adhesion, or missed fasteners, can show up as edge lifting or seam separation within a few years.
Unlike single-ply membranes like TPO or EPDM, modified bitumen has a multi-ply structure that can often be spot-repaired without replacing entire sections. That makes it a strong candidate for DIY fixes, provided the damage isn’t widespread or structural.
Common Signs Your Modified Bitumen Roof Needs Repair
Catching problems early is half the battle. Schedule a roof inspection twice a year, spring and fall, and after any major storm.
Surface cracks are hairline splits in the top layer, usually running parallel to the roll direction. They’re cosmetic at first but let water penetrate over time. Blisters look like bubbles or raised bumps and form when moisture or air gets trapped between plies. Small blisters (under 2 inches) are often just cosmetic: larger ones can rupture and expose the underlayment.
Tears and punctures are obvious: physical breaks in the membrane, often near roof penetrations, edges, or high-traffic areas. Seam separation occurs when the overlap between sheets lifts or peels, especially on heat-welded seams that weren’t properly fused. Granule loss on cap sheets exposes the black bitumen underneath, accelerating UV damage.
Inside the building, water stains on ceilings, mold growth, or a musty smell are red flags. By the time you see interior damage, the roof has likely been leaking for a while. Don’t wait, investigate immediately.
Tools and Materials You’ll Need for Modified Bitumen Roof Repair
Modified bitumen roof repair requires specialty materials, but the tools are straightforward. Gather everything before heading up, multiple trips waste time and test your patience.
Materials:
- Bitumen roof patch or mastic (trowel-grade: cold-applied asphalt cement formulated for modified bitumen)
- Self-adhering modified bitumen patch membrane (6-inch or 12-inch rolls work for most repairs)
- Primer (asphalt-based, compatible with modified bitumen)
- Roofing fabric or mesh (for reinforcing larger repairs)
- Granulated cap sheet patch (if matching finish is important)
- Mineral spirits or denatured alcohol (for cleaning)
Tools:
- Utility knife with hooked roofing blade
- Trowel or putty knife (4-inch works well)
- Stiff bristle brush or broom
- Propane torch and striker (only if you’re comfortable with torch-applied repairs: otherwise stick to cold-applied methods)
- Roller or hand tamper (for pressing patches)
- Measuring tape and straight edge
- Safety harness, non-slip footwear, gloves, and safety glasses
PPE is non-negotiable. Low-slope roofs are slippery, especially when wet. A fall-arrest harness anchored to a secure point is required if the roof pitch exceeds 4:12 or if edges are unprotected. Wear long sleeves, bitumen products are sticky and hard to wash off skin.
Work only in dry conditions with temperatures between 50°F and 85°F. Cold bitumen won’t adhere: hot conditions make membranes too soft to work with. Check the forecast and plan accordingly.
Step-by-Step Guide to Repairing Small Cracks and Blisters
Small surface cracks and blisters are the easiest repairs. They take under an hour and require no special skills.
For surface cracks (less than 1/8 inch wide):
- Clean the area. Sweep away dirt, gravel, and loose granules with a stiff brush. Wipe with a rag dampened with mineral spirits to remove oils or residue. Let dry completely.
- Apply primer. Brush a thin coat of asphalt primer over the crack and 2 inches beyond on all sides. This improves adhesion. Wait 15-30 minutes until tacky but not wet.
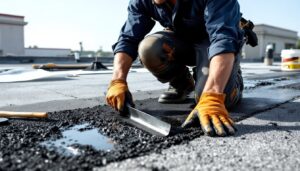
- Fill the crack. Use a putty knife to press bitumen mastic into the crack, overfilling slightly. Smooth it level with the surrounding surface.
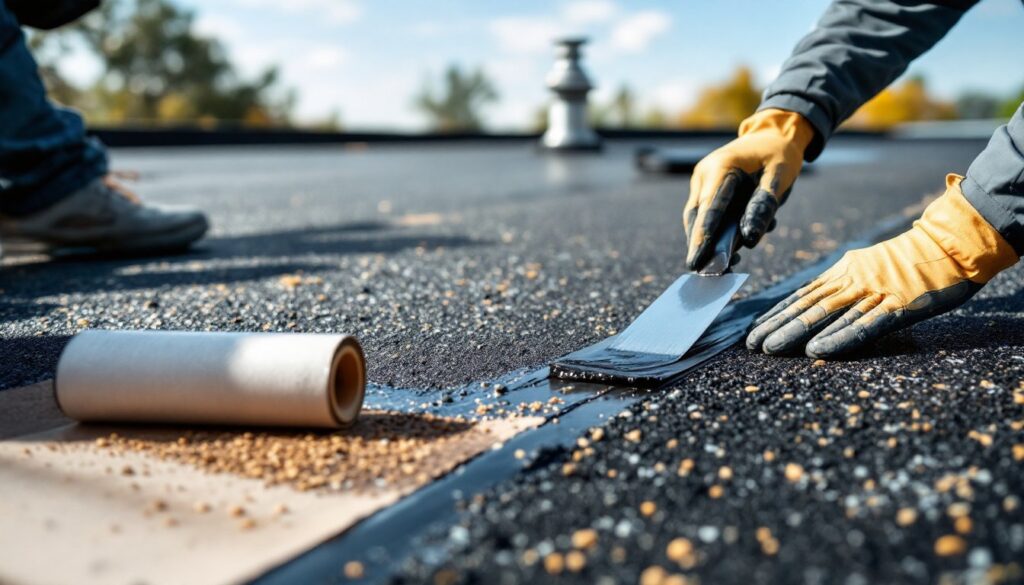
- Apply a patch strip. Cut a strip of self-adhering bitumen patch membrane 4 inches wide and long enough to cover the crack plus 3 inches on each end. Peel the backing and press firmly into place, rolling with a hand roller to eliminate air bubbles.
- Seal edges. Trowel a thin bead of mastic along all four edges of the patch to lock it down.
For blisters:
- Cut the blister open. Use a utility knife to make an X-shaped cut through the blister, stopping at the underlayment. Don’t cut all the way through the roof deck.
- Pry open and dry out. Gently lift the flaps. If moisture is present, use a rag or heat gun (carefully) to dry the cavity. Let it air out for 30 minutes on a sunny day.
- Apply mastic under flaps. Spread a generous layer of bitumen mastic inside the cavity and on the underside of each flap.
- Press flat and seal. Push the flaps down, pressing out air. Nail or fasten the center if needed (use roofing nails with plastic caps). Cover the entire repair with a bitumen patch, extending 3 inches past the cut in all directions.
- Top-coat with mastic. Trowel a thin layer of mastic over the patch and feather the edges.
These repairs blend in reasonably well and, if done right, can last several years. For a finished look matching the original roof, top the repair with a piece of granulated cap sheet cut to size and adhered with mastic.
How to Patch Larger Tears and Punctures in Modified Bitumen
Tears longer than 6 inches or punctures that penetrate multiple plies require a more robust repair. This is still a DIY job, but it’s more involved.
- Assess the damage. If the tear extends into or through the roof deck, or if there’s rot or sagging, stop and call a professional. Structural damage is beyond patch-and-go repairs.
- Cut out damaged membrane. Use a utility knife and straightedge to cut a rectangle around the tear, removing all damaged material. Extend the cut 2 inches beyond visible damage on all sides. Remove any loose granules or debris.
- Inspect and dry the substrate. Check the underlayment or deck for moisture, rot, or soft spots. Replace any compromised decking (this may require a pro if you’re not comfortable with structural carpentry). Let everything dry completely.
- Prime the area. Brush asphalt primer over the exposed substrate and 3 inches onto the surrounding intact membrane.
- Cut and apply the base patch. Cut a piece of self-adhering modified bitumen membrane (or use torch-applied if you’re experienced) 4 inches larger than the hole on all sides. Peel backing and press into place, working from the center outward to avoid wrinkles. Roll firmly with a hand roller.
- Add reinforcing fabric (optional but recommended). For tears or high-stress areas, embed a piece of roofing fabric in a layer of mastic over the base patch, then apply mastic on top of the fabric. This adds tensile strength.
- Apply the cap patch. Cut a second patch 6 inches larger than the base patch on all sides. This creates a layered, overlapping repair. Adhere it the same way, ensuring all edges are sealed with mastic.
- Seal and finish. Trowel a bead of mastic around the perimeter of the top patch, feathering it smooth. If aesthetics matter, top with a granulated cap sheet patch.
Most flat roof replacement projects involve similar membrane layering techniques, so understanding this repair sequence builds useful knowledge for larger projects down the road.
Cure time: Cold-applied repairs need 24-48 hours to fully cure. Keep foot traffic off the patch during this period. Torch-applied patches cure faster but require skill and safety equipment.
When to Call a Professional vs. DIY Repair
Not every roofing problem is a DIY candidate. Here’s how to know when to hand it off.
Call a pro if:
- Damage covers more than 10-15% of the roof surface. At that point, a full re-roof or overlay is more cost-effective than patching.
- You find soft, spongy decking or visible rot. This indicates structural damage that requires carpentry and possibly building inspection.
- Seams are failing across multiple areas. Widespread seam separation suggests installation issues or end-of-life membrane, both of which need pro assessment.
- The roof is older than 15-20 years. Modified bitumen has a typical lifespan of 15-25 years. If it’s near the end, repairs are just buying time, budget for replacement.
- You’re uncomfortable working at height, using a torch, or handling hot bitumen. Roofing is inherently risky. If you’re not confident, hire out.
- Local codes require a permit. In many jurisdictions, repairs over a certain square footage or cost threshold need permits and inspections. Check with your building department.
DIY is a good fit if:
- Damage is localized: a single blister, crack, or small tear.
- The roof is otherwise in good shape with no widespread wear.
- You have basic tool skills, can safely access the roof, and have the time to do it right.
When hiring, get at least three quotes. Ask if the contractor is licensed and insured, and request references. Many reputable contractors listed on Angi specialize in commercial and residential flat roofing and can provide detailed assessments.
For broader guidance on roofing best practices and tool selection, This Old House offers in-depth tutorials and product reviews that can help you evaluate whether a project fits your skill level.
Conclusion
Modified bitumen roofs are built to last, but they’re not invincible. Catching small cracks, blisters, and tears early and patching them properly can add years to a roof’s life and prevent expensive interior damage. Most homeowners with basic DIY skills can handle minor repairs using cold-applied materials and straightforward techniques. For larger damage or aging roofs, don’t hesitate to bring in a professional, the upfront cost beats dealing with structural rot or insurance headaches later. Keep your roof clean, inspect it twice a year, and address problems as soon as they show up. That’s the recipe for a reliable, low-maintenance roof.