Table of Contents
ToggleWhen a storm rolls through with high winds, hail, or driving rain, your roof takes the brunt of the assault. Within hours, a few missing shingles can turn into a leak that compromates insulation, drywall, and framing. Storm damaged roof repair isn’t something to put off, it’s an urgent task that protects your home’s structure and prevents exponential repair costs down the line. This guide walks homeowners through identifying damage, taking immediate action, deciding when to call in a pro, navigating the repair process, working with insurance, and fortifying the roof against future storms.
Key Takeaways
- Storm damage roof repair requires immediate action to prevent water infiltration that can compromise insulation, drywall, and structural framing.
- Document all visible damage with timestamped photos, tarp exposed areas with 6-mil polyethylene, and contact your insurance company within 24–48 hours to fast-track claims.
- Call a professional roofer for steeply pitched roofs, structural damage, multi-layer tear-offs, or repairs involving more than 10–15 shingles; DIY is suitable only for isolated shingle replacements on low-to-moderate pitches.
- Upgrade to Class 4 impact-resistant shingles (UL 2218), install synthetic underlayment, and reinforce shingle adhesion to reduce vulnerability to future hail and wind damage.
- Avoid storm chasers by verifying contractors are licensed, bonded, and insured; get independent estimates and keep meticulous records of all repairs and insurance communications.
- Perform annual spring or fall inspections, maintain gutters twice yearly, trim overhanging branches within 6–10 feet, and secure flashing with polyurethane sealant to prevent recurring storm damage.
Identifying Storm Damage on Your Roof
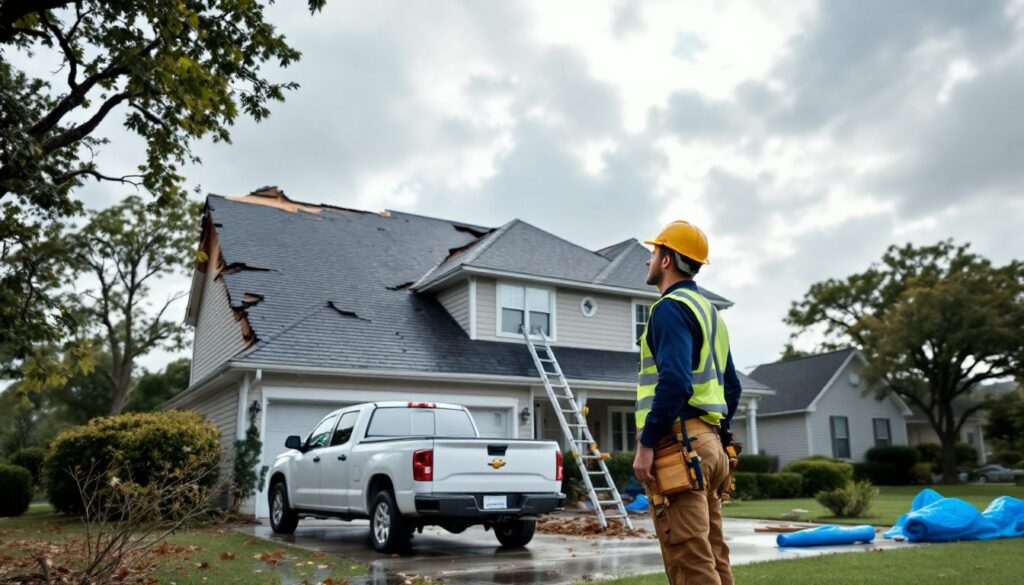
Storm damage isn’t always obvious from the ground. Sometimes it’s subtle, a few granules missing from asphalt shingles, a cracked flashing seal, or a lifted edge that’ll fail in the next rain. Other times, it’s glaringly obvious: punctured decking, entire shingle sections gone, or a dented metal roof.
Start with a ground-level visual inspection using binoculars. Look for missing or displaced shingles, dents in metal roofing or flashing, and debris accumulation in valleys. Check gutters for an unusual amount of granule runoff, those ceramic-coated granules protect asphalt shingles from UV damage, and heavy loss signals the shingle mat is exposed and vulnerable.
If you’re comfortable with ladder work and have fall protection, a closer inspection from the roof edge can reveal more. Never walk a wet or steeply pitched roof without proper safety gear. Look for:
- Cracked, curled, or torn shingles
- Exposed or popped nails
- Damaged or separated flashing around chimneys, vents, and skylights
- Soft spots or sagging areas in the decking (a sign of water infiltration)
Inside the attic, use a flashlight to check for daylight penetrating the roof deck, water stains on rafters or insulation, and any musty odors indicating hidden leaks.
Common Types of Storm-Related Roof Damage
Hail damage is one of the most common and insidious. Hailstones can bruise asphalt shingles, creating divots that strip away granules and expose the underlying mat. On impact, the mat fibers can fracture without immediately tearing, but UV exposure accelerates deterioration. Metal roofing shows dimpling or denting, which may not leak initially but can compromise protective coatings.
Wind damage typically manifests as lifted, creased, or entirely missing shingles. Winds can pry up shingle edges, especially if the adhesive seal strip hasn’t bonded fully, then tear them off or fold them back. High winds also lift and bend flashing, breaking seals and creating entry points for water.
Water and debris damage often follows heavy rain or fallen branches. Punctures from limbs can crack or penetrate the roof deck. Persistent water pooling (ponding) on low-slope sections can seep under shingles or roofing membranes, saturating underlayment and decking. Clogged gutters exacerbate the problem by forcing water to back up under the roof edge.
Immediate Steps to Take After Storm Damage
Once the storm passes and it’s safe to go outside, act quickly to limit secondary damage.
- Document everything. Take wide-angle and close-up photos of all visible damage from multiple angles, roof, siding, gutters, and ground debris. Photograph the interior if you have leaks (ceiling stains, pooled water, damaged insulation). Time-stamp these images: they’re critical for insurance claims.
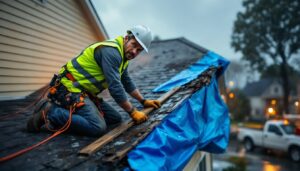
- Tarp exposed areas. If shingles are missing or the roof is punctured, a heavy-duty polyethylene tarp (at least 6-mil thickness) can prevent further water intrusion. Secure it by sandwiching the edge under 2×4 boards fastened to the roof with roofing screws (not nails that can work loose). Extend the tarp at least 4 feet beyond the damaged area and over the ridge if possible. Safety first: don’t climb onto a wet, damaged, or steeply pitched roof without a harness and anchor point.
- Contain interior leaks. Place buckets under active drips, move furniture and valuables, and lay down plastic sheeting. Use a wet/dry vacuum to extract standing water from carpet or flooring quickly, delay encourages mold growth.
- Contact your insurance company. Report the claim within 24–48 hours. Many carriers have dedicated storm-response teams that fast-track inspections after major weather events. Ask about emergency repair coverage: some policies reimburse temporary tarping and mitigation work.
- Secure the property. Clear debris from gutters and downspouts to restore drainage. Remove fallen branches carefully, if they’re resting on the roof, stabilize them before cutting to avoid sudden shifts that could cause more damage.
Do not make permanent repairs before the insurance adjuster inspects unless the policy explicitly allows it or you’re documenting every step. Emergency measures (tarps, boarding up) are generally covered, but replacing shingles or decking prematurely can complicate your claim.
When to Call a Professional vs. DIY Repairs
Some storm damage is within the scope of a confident DIYer: other situations demand a licensed contractor.
Call a professional if:
- The roof is steeply pitched (8:12 or greater), making safe access difficult without specialized equipment.
- Structural damage is present, sagging, cracked rafters, compromised decking, or multiple punctures.
- Flashing around chimneys, skylights, or valleys needs replacement or complex resealing.
- You’re dealing with a multi-layer tear-off (old shingles under the top layer) that wasn’t obvious until damage occurred.
- The repair involves more than 10–15 shingles or affects multiple roof planes.
- Local building codes require a permit and inspection for the scope of work.
- You’re uncomfortable with ladder work, heights, or lack fall-arrest gear.
DIY-friendly repairs include:
- Replacing a few isolated asphalt shingles (3-tab or architectural) on a low-to-moderate pitch roof.
- Resealing lifted shingle tabs with roofing cement and a caulk gun.
- Replacing a small section of damaged underlayment if the decking is sound and you’re already removing shingles.
- Clearing debris and straightening bent gutters.
Tools and materials for a basic shingle replacement:
- Flat pry bar (for lifting and removing nails)
- Roofing nails (1¼-inch galvanized for standard shingles)
- Hammer or pneumatic roofing nailer
- Utility knife with hook blades
- Roofing cement (in a tube or can)
- Replacement shingles that match the existing type, color, and manufacturer (bring a sample to the supplier if unsure)
- Safety harness, roof anchors, work gloves, rubber-soled boots, and eye protection
If you’re not confident in your ability to work safely at height or diagnose hidden damage, calling a roofer is the smarter move. A botched DIY repair can void warranties, fail prematurely, and cost more to fix than hiring a pro upfront.
The Storm Damage Roof Repair Process
Whether you’re tackling the work yourself or hiring a contractor, understanding the repair sequence helps you plan materials, time, and budget.
1. Assessment and Planning
A thorough inspection determines whether the damage is cosmetic (a few shingles) or extends to the underlayment and decking. Soft or spongy spots indicate saturated OSB or plywood sheathing that needs replacement. Factor in any code updates, some jurisdictions now require synthetic underlayment or ice-and-water shield in vulnerable areas even if the original install didn’t have them.
2. Removing Damaged Materials
Use a flat pry bar to lift the shingles above and adjacent to the damaged area, exposing the nails. Remove nails carefully to avoid tearing sound shingles. If decking is compromised, cut out the damaged section with a circular saw set to the deck thickness (typically ½-inch or ⅝-inch OSB/plywood), cutting back to the center of the nearest rafter on each side for solid nailing.
3. Replacing Decking and Underlayment
Cut new sheathing to fit, ensuring edges land on rafter centers. Fasten with 8d ring-shank nails every 6 inches along edges and 12 inches in the field. Install new underlayment, #15 or #30 felt or a synthetic like Titanium UDL, overlapping at least 2 inches horizontally and 6 inches at hips and valleys. In cold climates or low-slope areas, consider adding a self-adhering ice-and-water barrier along eaves and valleys.
4. Installing Replacement Shingles
Slide the new shingle into place, aligning it with adjacent courses. Lift the shingle above to access the nailing zone, typically 5 to 6 inches above the bottom edge for architectural shingles. Drive four nails per shingle (six in high-wind zones), just below the adhesive strip. Press down the overlapping shingle and apply a dab of roofing cement under any lifted edges.
For metal roofing, replacement often involves removing and reseating panels with new fasteners and sealant. This work is less forgiving, misaligned panels or over-driven screws can create leaks.
5. Final Inspection and Cleanup
Walk the perimeter and check for loose nails, debris, and proper shingle alignment. Run a magnetic sweep or rake to collect stray nails from the yard and driveway. Verify that flashing is sealed and gutters are reattached securely.
Working With Insurance for Storm Damage Claims
Navigating a storm damage insurance claim can be as stressful as the damage itself, but preparation and documentation smooth the process.
File promptly. Most homeowners policies require notification within a specific window (often 48–72 hours). Missing this deadline can jeopardize coverage.
Schedule the adjuster visit. The insurance adjuster will inspect the damage and estimate repair costs. Be present during the inspection, point out all damage (interior and exterior), and provide your photo documentation. If you’ve already had a roofer inspect, share that report, it can corroborate your claim.
Understand your coverage. Policies vary widely. Some cover replacement cost (the full cost of new materials and labor), while others cover actual cash value (replacement cost minus depreciation). Wind and hail damage are typically covered, but flood damage requires separate flood insurance. Check your deductible, storm damage deductibles can be a flat amount or a percentage of the home’s insured value (often 1–5%).
Get multiple estimates. Don’t rely solely on the adjuster’s figure. Hire a reputable contractor (check Angi for reviews and ratings) to provide an independent estimate. If there’s a significant gap between the adjuster’s and contractor’s numbers, you can file a supplemental claim for the difference.
Avoid storm chasers. After major weather events, unlicensed contractors often canvass neighborhoods offering quick fixes. They may demand large upfront payments, perform shoddy work, then disappear. Verify the contractor is licensed, bonded, and insured. Ask for local references and check their standing with the Better Business Bureau.
Keep meticulous records. Save all receipts for emergency tarping, mitigation, and repairs. Document every phone call, email, and meeting with the insurer and contractors. This paper trail is invaluable if disputes arise.
Preventing Future Storm Damage to Your Roof
Smart maintenance and targeted upgrades can significantly reduce vulnerability to the next storm.
Annual inspections catch small issues before they escalate. Schedule a professional inspection each spring or fall, or after major weather events. Look for loose or damaged shingles, deteriorated flashing, and clogged gutters. Homeowners comfortable on a ladder can use guidance from Today’s Homeowner to perform basic seasonal checks themselves.
Upgrade to impact-resistant shingles. Class 4 impact-rated asphalt shingles (UL 2218) feature reinforced mats and can withstand hailstones up to 2 inches in diameter. They cost 10–20% more than standard shingles but often qualify for insurance discounts and have longer warranties.
Reinforce shingle adhesion. In high-wind zones, consider shingles with enhanced adhesive strips or add a bead of roofing cement under shingle tabs during installation. Some manufacturers offer wind-rated shingles tested to withstand gusts up to 130 mph.
Install proper underlayment and drip edge. Synthetic underlayment is more durable and tear-resistant than felt. A metal drip edge along eaves and gables directs water away from fascia and prevents wind-driven rain from wicking under shingles.
Trim overhanging branches. Trees within 6–10 feet of the roof can drop limbs during storms or allow squirrels and raccoons easy access. Prune branches back and remove dead wood annually.
Secure or upgrade flashing. Ensure step flashing along walls and chimneys is mechanically fastened and sealed with high-quality polyurethane or silicone sealant (not tar or asphalt cement, which can crack).
Maintain gutters and downspouts. Clean gutters at least twice a year and after storms. Install gutter guards to reduce debris accumulation. Ensure downspouts discharge at least 4–6 feet from the foundation to prevent water pooling near the house.
Consider a roof inspection after every major storm, even if damage isn’t obvious. Small fractures or lifted seals can worsen over time, and catching them early means a tube of sealant instead of a full shingle replacement.