Table of Contents
ToggleThermador dishwashers are built for performance and longevity, but even premium appliances need occasional repairs. When a $2,000+ dishwasher stops draining, won’t start, or leaves dishes grimy, calling a tech immediately can feel like the only option. But many common Thermador issues are surprisingly DIY-friendly, if you know what you’re looking for. This guide walks through the most frequent problems, the tools and parts you’ll need, and clear steps for tackling repairs yourself. Whether it’s a faulty door latch or a clogged spray arm, most homeowners with basic mechanical skills can handle these fixes and save hundreds in service calls.
Key Takeaways
- Many common Thermador dishwasher repair issues—including door latch problems, clogged spray arms, and inlet valve failures—can be resolved DIY-style in 30–90 minutes, saving $150–$400 per service call.
- Always identify your exact Thermador dishwasher model number before ordering parts, as components are specialized and not interchangeable with standard brands.
- Power-on failures often stem from tripped breakers, misaligned door latches, or blown thermal fuses; check these before assuming control board failure.
- Poor cleaning performance typically results from hard water deposits clogging spray arm nozzles—a 30-minute vinegar soak usually restores performance.
- DIY repairs work best for mechanical and minor electrical components; contact a professional for control board diagnostics, heating elements, electrical shorts, or any issue requiring specialized tools and schematics.
- Always shut off power at the breaker and confirm your warranty status before opening your Thermador dishwasher, as unauthorized repairs may void coverage.
Understanding Your Thermador Dishwasher and When to Repair
Thermador dishwashers, often integrated into high-end kitchens, use specialized components like stainless steel tubs, advanced wash systems, and European-style controls. Parts aren’t always interchangeable with standard brands, so identifying your exact model number (stamped inside the door frame or on the side panel) is critical before ordering replacements.
Repair makes sense when the unit is under 10 years old and the issue is isolated to a single component: door latch, spray arm, filter assembly, or drain pump. If you’re facing compounding failures (motor, control board, and pump all failing within months), or the tub has stress cracks, replacement is usually more cost-effective.
Check your warranty status first. Thermador offers a standard one-year full warranty and often extended coverage on select parts. Opening the unit yourself may void remaining coverage, so confirm terms before breaking any seals. If you’re still covered, schedule service through Thermador or an authorized provider.
For out-of-warranty units, DIY repair can save $150–$400 per service call, not counting parts markup. Most common fixes take 30–90 minutes and require only hand tools, no soldering or complex diagnostics.
Most Common Thermador Dishwasher Problems and Solutions
Dishwasher Won’t Start or Power On
If the control panel is dark or unresponsive, start with the simplest culprits. Check that the unit is receiving 120V AC power at the junction box under the sink, use a non-contact voltage tester to confirm. Inspect the home’s breaker panel: Thermador dishwashers typically run on a dedicated 15A or 20A circuit. Reset any tripped breakers.
Next, examine the door latch and strike plate. Thermador models use a micro-switch inside the latch assembly that signals the control board when the door is secure. If the latch is misaligned, broken, or the strike is loose, the dishwasher won’t power on. Open the door, remove the two Torx screws securing the latch assembly to the tub, and inspect for cracks or worn springs. Replacement latches cost $40–$80 and snap into place with minimal effort.
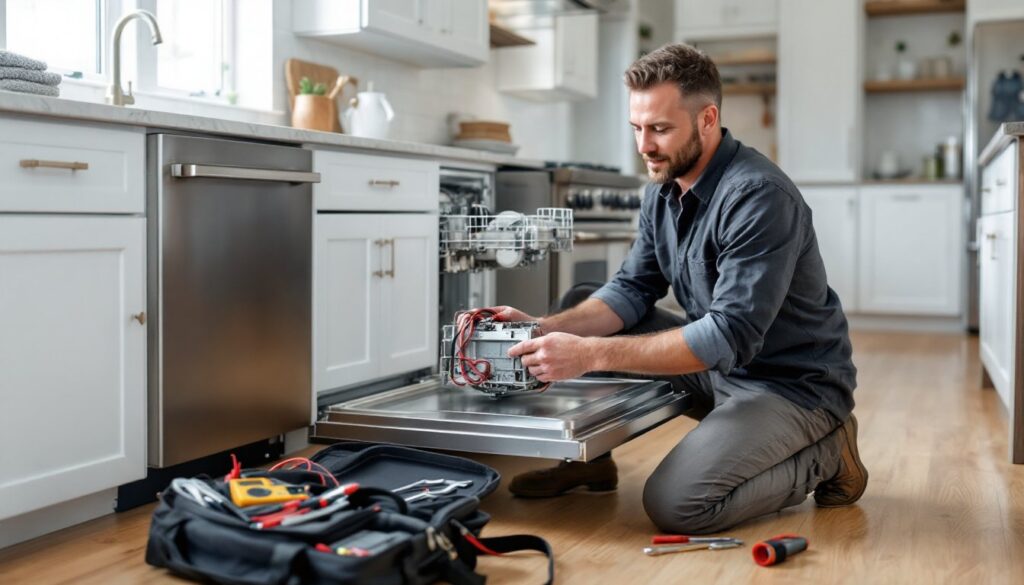
A less common cause is a blown thermal fuse on the control board, which protects against overheating. Accessing it requires removing the front lower panel and potentially the outer door panel (held by Torx screws around the perimeter). If you’re comfortable working near live terminals, use a multimeter to test continuity across the fuse. No continuity means it’s blown and must be replaced, this is a $10 part but requires careful handling of the control board.
If the display lights up but cycles won’t start, the issue may be the control board itself or wiring harness connections that have corroded. Spray electrical contact cleaner on harness terminals and reseat connections firmly. Control board replacement is a $200–$500 repair and may warrant professional help unless you’re experienced with appliance electronics.
Poor Cleaning Performance and Water Spray Issues
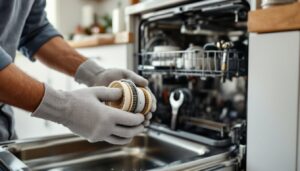
Clogged spray arms are the leading cause of poor wash results. Thermador uses a multi-level spray system with fine nozzles that plug easily with hard water deposits and food debris. Remove the lower and mid-level spray arms by twisting counterclockwise (most models) or releasing a center cap. Soak arms in a 50/50 white vinegar and water solution for 30 minutes, then use a toothpick or small wire to clear each nozzle.
Inspect the filter assembly at the tub bottom. Thermador filters are typically a coarse outer screen and a fine mesh cylinder that twist-lock together. Remove both, rinse under hot water, and scrub with a soft brush. A clogged filter reduces water pressure to the spray arms and can lead to drainage problems downstream.
If spray arms spin but water pressure is weak, the issue may be the circulation pump or inlet valve. The inlet valve (located behind the lower front panel, where the water line enters) should open fully during fill. Listen for a humming sound when the cycle starts, if it’s faint or absent, the valve’s solenoid may be failing. Replacement valves cost $50–$100 and connect via a quarter-turn compression fitting and two spade terminals. Shut off water at the supply valve under the sink before disconnecting.
Hard water buildup inside the sump and pump housing can also restrict flow. Run an empty cycle with a dishwasher descaler or two cups of white vinegar placed in a bowl on the top rack. For persistent buildup, remove the sump cover (several Torx screws at the tub base) and manually clean the pump impeller and housing. Wear nitrile gloves, residue can be abrasive.
Essential Tools and Parts for Thermador Dishwasher Repairs
Having the right tools on hand makes Thermador repairs straightforward. Most fasteners are Torx T15, T20, or T25, so a quality Torx bit set is non-negotiable. A nut driver set (especially 1/4″ and 5/16″) speeds up panel removal. You’ll also need a multimeter for testing electrical continuity on switches, fuses, and heating elements, plus a non-contact voltage tester to confirm power is off before working near terminals.
Other helpful items include needle-nose pliers, an adjustable wrench for water line fittings, and a small flashlight or headlamp for inspecting dark recesses under the unit. Keep a bucket and towels nearby, residual water in the sump and hoses will spill during disassembly.
For parts, always cross-reference your model number on Thermador’s parts site or a reputable appliance parts supplier. Common replacement components include:
- Door latch assembly ($40–$80)
- Spray arm (lower or upper, $20–$60 each)
- Inlet water valve ($50–$100)
- Drain pump ($80–$150)
- Thermal fuse ($10–$20)
- Control board ($200–$500, model-specific)
- Rinse aid dispenser ($30–$60)
Avoid generic “universal” parts for Thermador, fit and function are rarely guaranteed. OEM (original equipment manufacturer) parts ensure proper operation and longevity. Some online retailers offer diagrams that let you click on the exact part in an exploded view of your model, which is invaluable for identifying obscure components.
Step-by-Step: Replacing Key Thermador Dishwasher Components
Replacing the Door Latch:
- Open the door fully and locate the two Torx T20 screws on the inner door edge securing the latch to the tub.
- Remove screws and pull the latch assembly straight out. Disconnect the wiring harness (press the tab and pull).
- Connect the harness to the new latch, slide it into position, and reinstall screws. Test by closing the door, mechanism should click firmly.
Replacing the Inlet Water Valve:
- Shut off water supply under the sink and disconnect power at the breaker.
- Remove the lower front kick panel (typically two spring clips or screws at the bottom edge).
- Locate the inlet valve where the water line enters the unit. Use an adjustable wrench to loosen the compression fitting on the water line.
- Disconnect the two spade terminals from the valve solenoid. Remove mounting screws and pull the valve free.
- Install the new valve, reconnect terminals, tighten the water line, and restore power. Run a short cycle and check for leaks.
Cleaning or Replacing the Drain Pump:
- Power off and remove the lower dish rack and filter assembly.
- Use a Torx T20 to remove screws securing the sump cover at the tub base. Lift cover and set aside.
- Inspect the pump impeller for debris or damage. If replacing, disconnect the wiring harness and drain hose clamp, then twist the pump counterclockwise to unlock from the housing.
- Install the new pump by aligning tabs and twisting clockwise. Reconnect hose and harness, reassemble sump cover, and test.
Safety note: Always disconnect power at the breaker before working inside the unit. Thermador dishwashers use 120V AC, which can cause serious injury. Wear safety glasses when working under the unit, sharp edges and falling screws are common. If you encounter active leaks or pooling water, turn off the water supply immediately and address the source before continuing.
When working with Thermador refrigerators or other high-end appliances, similar principles apply: identify the specific model, use OEM parts, and don’t skip diagnostic steps. If you’re tackling thermador refrigerator repair, expect even tighter tolerances and more complex refrigerant systems, many fridge repairs do require EPA certification for refrigerant handling.
When to Call a Professional vs. DIY Repair
DIY makes sense for straightforward mechanical and minor electrical repairs: door latches, spray arms, filters, inlet valves, and drain pumps. These involve hand tools, clear access points, and components that don’t require specialized diagnostics. If you can follow a wiring diagram and aren’t intimidated by a few screws, you’ll handle these fine.
Call a professional when the issue involves the control board with complex error codes you can’t decode, the heating element or high-limit thermostat (which requires precise continuity testing and safe disconnect procedures), or any situation with active electrical shorts or burning smells. If you’ve replaced an obvious part and the problem persists, further diagnostics may require service mode access and proprietary tools.
Gas or water line work also warrants a pro if you’re unsure. While Thermador dishwashers are electric, adjacent cabinetry may hide gas lines for cooktops. Any repair that requires moving the unit significantly increases risk of damaging supply lines.
Permits are rarely needed for appliance repairs, but if you’re installing a new circuit or upgrading wiring to support the dishwasher, local codes apply and an electrician or permit may be required (consult your AHJ, authority having jurisdiction).
For those in the Dallas area dealing with persistent Thermador appliance issues, resources like local service providers can provide qualified technicians familiar with the brand’s quirks. A good appliance repair tech will diagnose faster and carry specialty parts on the truck, worth the cost when time matters or you’re stuck mid-repair.
Bottom line: If the repair involves basic disassembly, swapping a part, and reassembly, do it yourself. If it requires schematics, soldering, or refrigerant, call someone licensed. Thermador appliances are repairable, but they’re not cheap to replace, know your limits and when to hand off the wrench.