Table of Contents
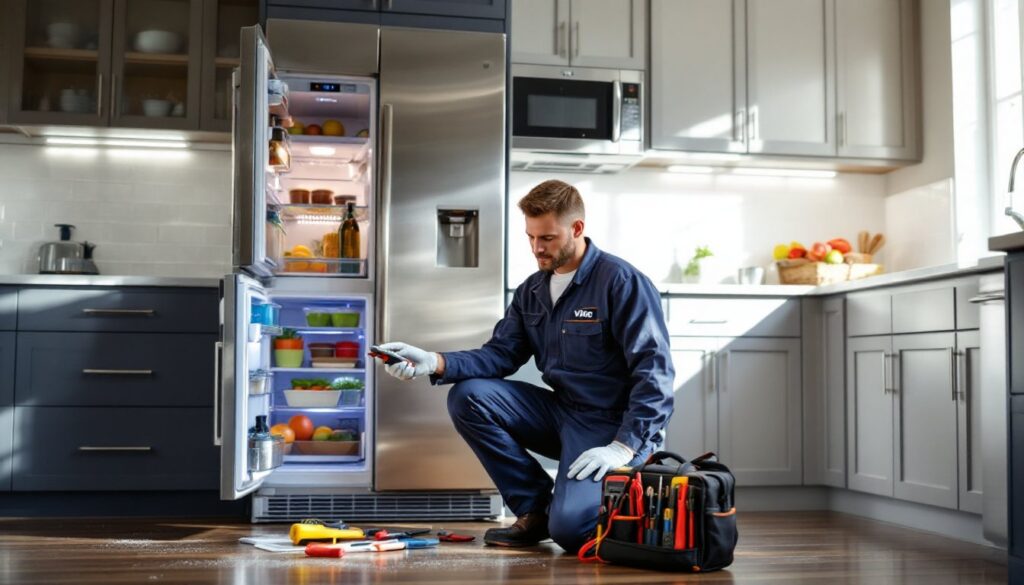
ToggleViking refrigerators are built like tanks, professional-grade cooling with commercial compressors and heavy-duty components. But when a $7,000+ appliance starts acting up, the repair bills can sting just as hard as the initial investment. The good news? Many Viking refrigerator issues aren’t as catastrophic as they seem. Temperature swings, noisy compressors, and finicky ice makers often trace back to simple fixes that don’t require a service call. Before dropping $300 on a technician’s diagnostic fee, it’s worth understanding what’s happening inside that stainless steel fortress and which problems you can tackle yourself.
Key Takeaways
- Many common Viking refrigerator repair issues—including dirty condenser coils, worn door gaskets, and clogged water inlet valves—can be resolved without professional help and save hundreds on service calls.
- Viking refrigerator temperature control problems usually stem from simple causes like blocked airflow, faulty door seals, or dirty coils rather than expensive control board failures.
- Before calling a technician, perform basic troubleshooting: power cycle the unit, verify temperature settings, inspect the evaporator fan, and check the defrost system for ice buildup.
- Sealed system repairs involving refrigerant leaks, compressor replacement, or evaporator work require EPA-certified technicians and should never be attempted as DIY projects.
- Regular maintenance—cleaning filters every six months, vacuuming condenser coils annually, and flushing defrost drains—prevents most Viking refrigerator problems and extends appliance lifespan.
Understanding Your Viking Refrigerator
Viking refrigerators aren’t your standard big-box appliances. They’re designed for serious cooks who need precise temperature control and commercial-level performance. Most models use dual compressor systems, separate cooling units for the fridge and freezer compartments, which prevents odor transfer and maintains optimal humidity levels.
The compressors in Viking units are typically larger and more powerful than standard residential models, cycling less frequently but running harder when they kick on. That’s normal. What isn’t normal is constant cycling, loud grinding, or failure to reach set temperatures.
Understand the difference between a built-in and a freestanding Viking model. Built-ins require front ventilation and sit flush with cabinetry, while freestanding models vent from the rear. This matters for troubleshooting, if a built-in’s front grille is blocked by a cabinet panel or kicked plate, airflow gets choked and the compressor overheats.
Most Viking refrigerators also feature electronic control boards rather than mechanical thermostats. These boards regulate defrost cycles, fan speeds, and temperature zones. When they fail, symptoms can be bizarre, one compartment freezing while the other warms, erratic defrost timing, or total shutdown. But before blaming the board, rule out simpler causes like dirty condenser coils or faulty door seals.
Most Common Viking Refrigerator Problems
Temperature Control Issues
If the fridge compartment is too warm or the freezer’s turning everything into a solid block, start with the basics. Dirty condenser coils are the number-one culprit. On built-in models, coils are typically located beneath the unit or behind the toe kick. On freestanding models, they’re on the back. Pull the unit out (turn off the water line first if it has an ice maker) and vacuum the coils with a brush attachment. Dust and pet hair act like insulation, forcing the compressor to work overtime.
Check the door gaskets next. Close the door on a dollar bill, if you can pull it out easily, the seal isn’t tight. Worn gaskets let warm air infiltrate, and the compressor never catches up. Replacement gaskets run $50–$150 depending on the model, and they’re DIY-friendly if you’ve got patience and a hairdryer to soften the new seal during installation.
Thermistor failure is another common issue. The thermistor is a temperature sensor that tells the control board when to cycle the compressor. If it’s reading incorrectly, you’ll get wild temperature swings. Testing requires a multimeter, resistance should change smoothly as temperature changes. If the reading is erratic or flatlines, replace it. Parts cost around $30–$60.
Overloading the fridge or blocking vents can also cause temperature problems. Viking units need airflow around stored items. Don’t pack food against the back wall or cover the internal vents.
Ice Maker and Water Dispenser Failures
Viking ice makers are reliable but picky about water pressure and quality. If ice production stops, first check the water supply line. Make sure the shut-off valve (usually under the sink or behind the fridge) is fully open. Low water pressure, below 20 psi, will prevent the ice maker from filling properly.
Inspect the water inlet valve at the back of the fridge. It’s a solenoid-operated valve that opens when the ice maker calls for water. If it’s clogged with sediment or mineral buildup, water flow gets restricted. Disconnect power and the water line, then remove the valve (usually two screws and a wire harness). Flush it with white vinegar or replace it if the screen is heavily fouled. Replacement valves cost $40–$80.
A frozen fill tube is common in freezers set below 0°F. The small tube that delivers water to the ice maker tray can freeze solid, blocking flow. Thaw it with a hairdryer on low heat, don’t use high heat or you’ll crack the plastic. Once thawed, check the freezer temperature. Viking recommends 0–5°F for the freezer: colder isn’t better.
If the ice maker fills but doesn’t harvest (eject) ice, the ejector motor or gear assembly may be stripped. These are specific to each Viking model and typically require ordering OEM parts. This repair edges into professional territory unless you’re comfortable disassembling the ice maker module.
Water dispenser issues often trace to a clogged filter or frozen dispenser line. Replace the water filter every six months, even if Viking’s indicator light hasn’t triggered. Depending on your water quality, filters can clog faster. If the dispenser line is frozen, the same low-freezer-temp issue as the fill tube applies. Some users also report common refrigerator problems that overlap across brands, including Viking and similar high-end models.
DIY Troubleshooting Steps Before Calling a Pro
Start with a full power cycle. Unplug the fridge or flip its dedicated breaker off for at least five minutes. This resets the control board and clears minor electronic glitches. It sounds too simple, but it works more often than you’d expect.
Next, verify the temperature settings. Viking control panels can be bumped or inadvertently adjusted. Fridge should be set between 35–38°F, freezer at 0–5°F. Use a standalone refrigerator thermometer to confirm actual temps match the display.
Run the diagnostics mode if your model supports it. Many Viking refrigerators have a built-in diagnostic sequence accessed by holding specific button combinations on the control panel (check your owner’s manual). Diagnostic mode will flash error codes on the display. Write them down and cross-reference with Viking’s service manual or online forums.
Inspect the evaporator fan. This fan circulates cold air from the evaporator coils throughout the compartments. If it’s not running, one section will be cold (near the coils) and the rest will be warm. Open the freezer and listen, the fan should hum steadily. If it’s silent, the motor may be burned out or the fan blade could be jammed with ice. Defrost the freezer completely (turn it off for 24 hours with doors open) and see if the fan spins freely.
Check the defrost system. Viking refrigerators use automatic defrost cycles controlled by a timer or adaptive defrost board. If the defrost heater or thermostat fails, ice builds up on the evaporator coils, blocking airflow. Signs include frost buildup in the freezer, reduced cooling, and fan noise (the blades hit the ice). A full manual defrost will restore function temporarily, but the underlying component needs replacement.
Clean the drain pan and defrost drain. During defrost cycles, melted ice drains to a pan beneath the fridge. If the drain tube is clogged, water backs up and can freeze, or it leaks onto your floor. Flush the drain with warm water and a bit of bleach to kill mold.
For DIYers comfortable with basic electrical testing, a multimeter is invaluable. You can test the thermistor, defrost heater, evaporator fan motor, and door switches for continuity. Viking schematics are available through appliance parts suppliers, having the wiring diagram for your specific model number makes troubleshooting far less guesswork.
While Viking refrigerators are a premium investment, they’re part of a broader landscape of reliable brands. According to repair professionals, top refrigerator brands are evaluated on longevity and ease of repair, with Viking consistently ranking high. If you’re also dealing with a Viking dishwasher that’s acting up, many of the same troubleshooting principles apply, check water supply, clean filters, and inspect door seals before assuming the worst.
When to Call a Professional Viking Repair Technician
Some repairs are firmly out of DIY territory. Refrigerant leaks are one. If you hear hissing, see oily residue around fittings, or the compressor runs constantly but the fridge stays warm, you likely have a leak. Refrigerant handling requires EPA Section 608 certification, specialized tools, and knowledge of pressures and charge weights. Don’t attempt this yourself.
Compressor replacement is another pro-only job. Compressors cost $400–$800 for the part alone, and installation involves recovering refrigerant, brazing lines, pulling a vacuum, and recharging the system. A botched compressor swap can destroy a $7,000 refrigerator.
If the control board is suspect, you can replace it yourself, they’re plug-and-play on most models, but diagnosis is tricky. Control boards are expensive ($200–$500), and they’re often misdiagnosed. A tech with a schematic and diagnostic software can pinpoint the fault in minutes, saving you from buying a board you don’t need.
Sealed system work, anything involving the evaporator, condenser, or refrigerant lines, is best left to certified technicians. Viking’s dual-compressor systems are more complex than standard fridges, and mistakes can cascade into major damage.
Also call a pro if your fridge is still under warranty or extended service plan. DIY repairs can void coverage, and Viking’s factory warranty is comprehensive for the first year, with longer coverage on sealed system components.
When hiring, look for Viking-certified technicians. Viking has a network of factory-authorized service providers trained on their specific systems. Generic appliance repair shops may lack the diagnostic tools and parts access needed for Viking units. Expect to pay $150–$250 for a service call and diagnosis, with labor rates of $100–$200/hour depending on your region.
For those who enjoy hands-on appliance work, kitchen appliance troubleshooting resources can provide additional context and tips, though Viking-specific guidance is always preferable for these high-end units.
Conclusion
Viking refrigerators are built to last, but they’re not immune to wear and common appliance issues. Many problems, dirty coils, worn gaskets, clogged filters, and minor electronic glitches, are well within a confident DIYer’s skill set. Tackle the simple stuff first, respect the complexity of sealed systems, and you’ll save hundreds on unnecessary service calls while keeping that high-performance fridge running strong.